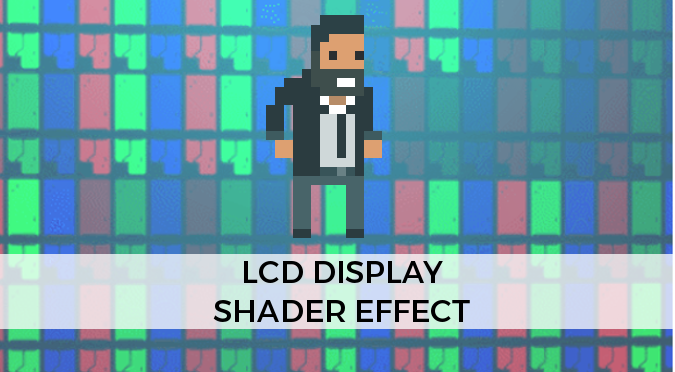

This tutorial will show how to create a realistic shader that simulate the look and feeling of LCD displays. Developer Monomi Park has recently announced (link) a new update to their game Slime Rancher. One of the most intriguing cosmetic effect that is going to be added is a special LCD shader that makes monitors look pixelated when you’re close to them. The effect was so cool that I simply had to recreate it.
- Introduction
- Step 1. The Pixelated Effect
- Step 2. The LCD Rendering
- Step 3. The Zooming Out Effect
- Conclusion & Download
Introduction
There are three different aspects that contributes to the LCD effect:
- Pixelated effect. The original image appears pixelated on the screen.
- LCD rendering. Each pixel is actually made out of smaller R, G and B cells, which active components contributes to the overall colour of the pixel.
- Zooming out effect. This effect can be appreciated only when looking closer to the monitor.
- Glitch effect. The screen periodically glitches, changing the colour and resolution of the pixels.
This tutorial will cover the first three points. It is important to notice that in real LCD monitor there is no need for a zooming out effect. This is because the overall image is indeed created only by small R, G and B cells. This will not happen in a shader. Without some specific code, a simple LCD rendering will introduce too many artefacts when seen from a distance.
Lastly, this effect is going to be based on a Standard surface shader. This allows to take advantage of other effects, such as reflections and emissions.
Step 1. The Pixelated Effect
The first part of the effect consists in a simple pixelated shader. The way we achieve this effect is simply by constraining the UV values before using them to sample the texture. Firstly, we add a property that indicates how many pixels our monitor has.
_Pixels ("Pixels", Vector) = (10,10,0,0)
The following code takes the UV values, as continuous values ranging from zero to one, and forces them to snap to _Pixels values only. We have explored this already in a previous tutorial: How to Snap to Grid:
float2 uv = round(IN.uv_MainTex * _Pixels.xy + 0.5) / _Pixels.xy;
fixed4 a = tex2D(_MainTex, uv);
//fixed4 c = tex2D(_MainTex, IN.uv_MainTex);
The result can be seen here:

It’s worth noticing that this is not necessarily the best way of pixelating an image for a LCD display. The variable _Pixels indicates how many pixels are present in the original mesh, ignoring the actual in-world size. If you scale the quad that contains the plort texture, the size of your pixels won’t change. This is inconsistent with the type of the effect we are aiming for. But as long as you don’t resize your monitors, you should be fine.
Step 2. The LCD Rendering
The LCD rendering is the part that seems most complicated, but is actually very easy. To achieve this effect, we need to replace each pixel of the image with the texture of some some LCD pixels. Simply by googling “LCD pixels” you can find the original image that Monomi Park used for their effect (source):
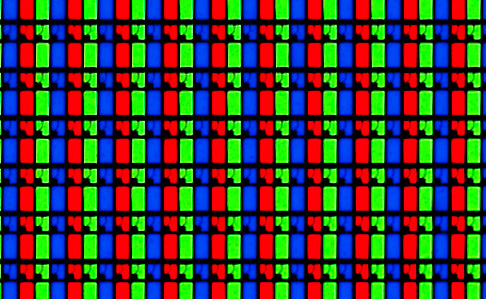
Theoretically we need only a single RGB cell. To avoid repetition, we can use a texture with many of them; this will give a more diverse look to our shader.
// Properties
_LCDTex("LCD (RGB)", 2D) = "white" {}
_LCDPixels("LCD pixels", Vector) = (3,3,0,0)

// Surf function
float2 uv_lcd = IN.uv_MainTex * _Pixels.xy / _LCDPixels;
fixed4 d = tex2D(_LCDTex, uv_lcd);
By multiplying the UV by _Pixels, we make sure that the sampled LCD texture fits with out pixels. The variable _LCDPixels indicates how many RGB cells are present in the image
What’s left now is to mix the two images:
o.Albedo = a * d;
o.Alpha = 1;
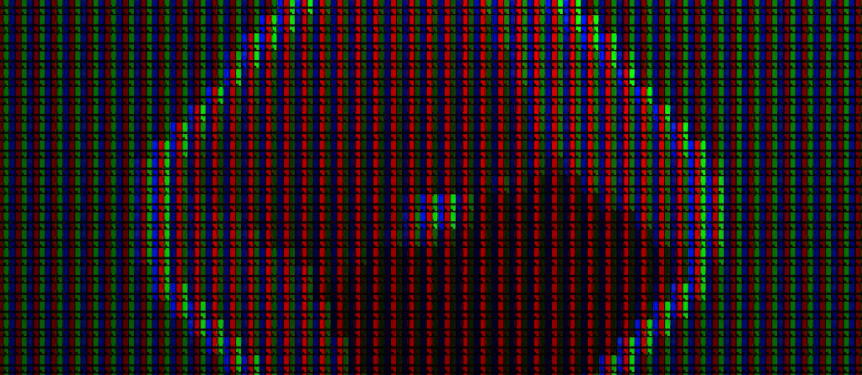
You can already see that the effect doesn’t look great when you zoom out. We will fix this in the next step.
⭐ Suggested Unity Assets ⭐
Step 3. The Zooming Out Effect
The LCD effect should be visible only when we’re watching the monitor closer. A distant viewer should only see the pixelated version. To put this in a more rigorous way, let’s say that at distance _DistanceOne from the camera (and closer) you see the full LCD effect, and that at distance _DistanceZero (and further) you only see the pixelated effect. All the other values in between are a linear interpolation of the two effects.
For this effect to work, we need two additional information: the position of the camera, and the position of the current fragment being drawn. The latter can be obtained by changing the input structure:
struct Input {
	float2 uv_MainTex;
	float3 worldPos;
};
The former, instead, is always available in the built-in variable _WorldSpaceCameraPos.
The following code takes the distance from the object and the camera, normalises it between zero and one and uses it as a mixing coefficient.
// Properties
_DistanceOne ("Distance of full effect", Float) = 0.5 // In metres
_DistanceZero ("Distance of zero effect", Float) = 1 // In metres

// Surf function
float dist = distance(_WorldSpaceCameraPos, IN.worldPos);
float alpha = saturate
	(
		(dist - _DistanceOne) / (_DistanceZero-_DistanceOne)
	);	// [_DistanceOne, _DistanceZero] > [0, 1]

// Mixing
o.Albedo = lerp(a * d, a, alpha);
This is the final effect:
Conclusion
This tutorial offers a good starting point to capture the realism of an LCD monitor using a shader. As you can see, it does not compare the quality of the one featured in Slime Rancher. When it comes to shaders, it is definitely true that the devil is in the detail. There are many things that can dramatically improve the look of this effect. For instance, a non linear zooming curve, a different blending colour function, the addition of some noise to make the colours oscillate, and so on. If you’re going to improve this effect, please feel free to share it with me.
As a disclaimer, I am not affiliated with Monomi Park and this tutorial is not based on a reverse engineering of their solution. At the time I wrote this tutorial, Monomi Park had yet to release the new update of Slime Rancher.
You can download the full Unity package for this tutorial here.
Other resources
💖 Support this blog
This website exists thanks to the contribution of patrons on Patreon. If you think these posts have either helped or inspired you, please consider supporting this blog.
📧 Stay updated
You will be notified when a new tutorial is released!
📝 Licensing
You are free to use, adapt and build upon this tutorial for your own projects (even commercially) as long as you credit me.
You are not allowed to redistribute the content of this tutorial on other platforms, especially the parts that are only available on Patreon.
If the knowledge you have gained had a significant impact on your project, a mention in the credit would be very appreciated. ❤️🧔🏻
Have you considered using ddx(uv) and/or ddy(uv) to determine when to switch between subpixel and pixel mode? To switch when the subpixel is smaller than a pixel?
Hey! No, I didn’t thought about that. I don’t really have much experience with it!
But this sounds like a good time to start exploring it a little bit more! :p
Awesome as always
Cool effects and explained very clearly
Your work is so precise and perfect. Thank you very much
Haha thank you for your kind message! <3
Ps. I KNOW RIGHT? 🙂
I recently did a similar style effect for a game I’m working on, though I was doing a old CRT rather than an LCD so I didn’t end up using the pixelation part of the effect.
However for the LCD subpixel fade out it is completely unnecessary to do any kind of distance based fade. Mip mapping a brightness multiplier will do it all for you.
The two things people run into when doing something like this that leads them to doing the fade out is if you just let the texture mip you get a dark display and you usually get some moire pattern effects, which sometimes people do want.
The first is easy to solve though, just multiply the image by a little over 3. Your first thought might be “that seems dumb”, but how do you think monitors work in real life? Each subpixel is super bright so that the resulting image looks just normally bright. You can get the “real” number to multiply with by taking the LCD image into an image editor and shrinking it down to 1 pixel. Assuming there’s an even ratio of RGB pixels in the image it should be a medium dark grey color, just do 255 / grey value and you have your brightness. You can also be lazy and sample a really small mip level in the vertex shader and get the same value there.
The second issue of the moire pattern can be mostly avoided, somewhat counter intuitively, by turning off anisotropic filtering on the texture.
Lastly if you do want the pixelation effect using fwidth or ddx / ddy really is a great way to deal with this as you can use them to know when the “pixel” size is nearing 1 pixel of real display (or at least real render buffer) to switch back to non-point sampled ness.
Psuedo code:
float2 scaledUV = i.uv * _Pixels.xy;
float2 pixelDeriv = fwidth(scaledUV);
float pixelWidth = length(pixelDeriv); // >= 1 when each “pixel” is smaller than an on screen pixel