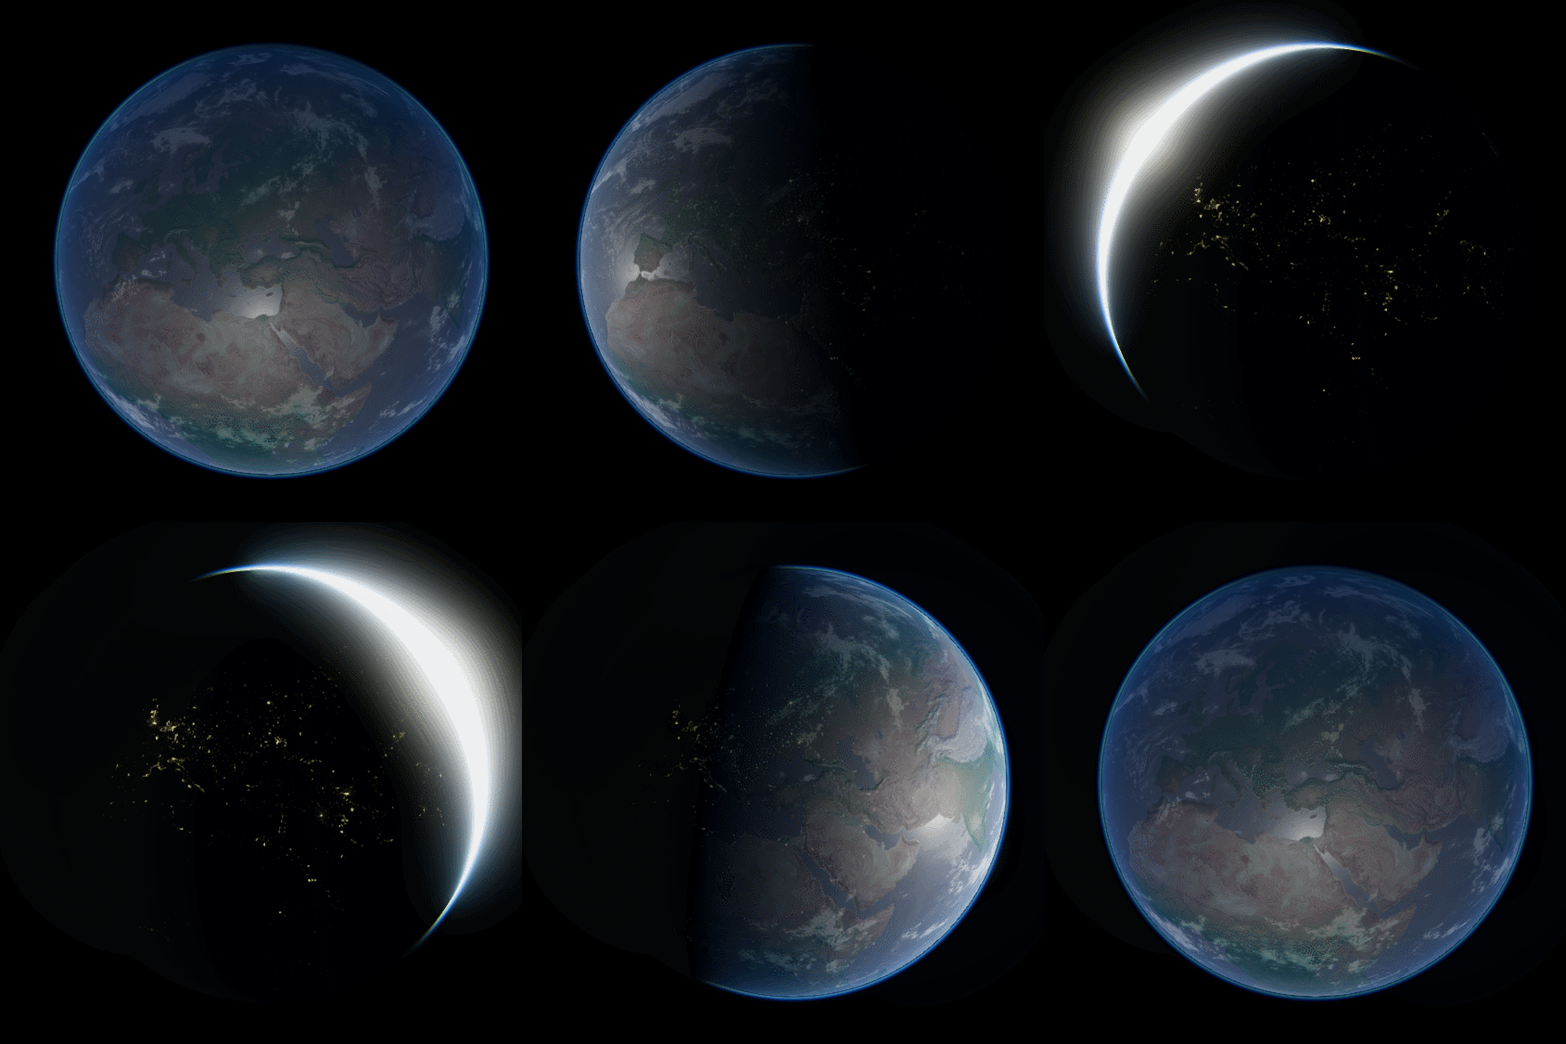
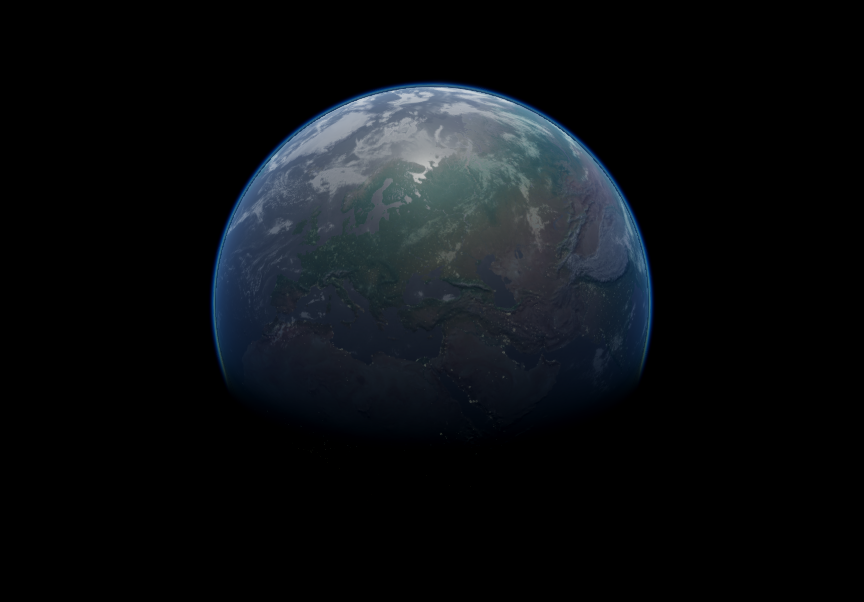
If you have lived long enough on planet Earth, you might have wondered why the sky is usually blue, yet red at sunset. The optical phenomenon which is (mostly) responsible for that is called Rayleigh scattering. This tutorial will explain how to model atmospheric scattering to reproduce many of the visual effects that planets exhibit. And if you want to render physically accurate visuals for alien planets, this is definitely the tutorial you’ve been looking for.
You can find all the post in this series here:
- Part 1. Volumetric Atmospheric Scattering
- Part 2. The Theory Behind Atmospheric Scattering
- Part 3. The Mathematics of Rayleigh Scattering
- Part 4. A Journey Through the Atmosphere
- Part 5. A Shader for the Atmospheric Sphere
- Part 6. Intersecting The Atmosphere
- Part 7. Atmospheric Scattering Shader
- 🔒 Part 8. An Introduction to Mie Theory
You can download the Unity package for this tutorial at the bottom of the page.
Introduction
What makes atmospheric effects so hard to recreate, is the fact that the sky is not a solid object. Traditional rendering techniques assume that objects are nothing more than an empty shell. All the graphical computation happens only on the material surfaces, regardless of what’s inside. This massive simplification allows rendering solid objects very efficiently. The aspect of certain materials, however, is determined by the fact that light can penetrate them. The final look of translucent objects results from the interaction of the light with their internal structure. In most cases, such interaction can be faked very effectively, as seen in the tutorial on Fast Subsurface Scattering in Unity. Sadly, this is not the case if we want to recreate a believable sky. Instead of rendering only the “outer shell” of a planet, we need to simulate what happens to the rays of light that pass through the atmosphere. Propagating the calculations inside an object is known as volumetric rendering, as is a topic that has been discussed extensively in the Volumetric Rendering series. The two techniques that were presented in that series (raymarching and signed distance functions), cannot be used effectively to simulate atmospheric scattering. This tutorial will introduce a more appropriate approach to render solid translucent objects, often referred as volumetric single scattering.
Single Scattering
In a room without any light, you would expect to see nothing. Objects become visible only when a ray of light bounces off them and hit our eyes. Most gaming engines (such as Unity and Unreal) assume that light travels “in a vacuum”. This means that objects are the only things that can affect light. In reality, light always travels through a medium. In our case, that medium is the air we are breathing. As a result, the way objects look is affected by how much air light is travelling through. On the surface of Earth, the air density is relatively low; its contribution is so tiny that it can only be truly appreciated when light travels great distances. Mountains that are far away blend with the sky, although objects close to us appear virtually unaffected by atmospheric scattering.
The first step to replicate the optical effects of atmospheric scattering is to understand how light travels through a medium like air. As said before, we can only see something when light hits our eyes. In the context of 3D graphics, our eye is the camera used to render the scene. The molecules that make up the air around us can deflect the light rays traelling through them. Hence, they have the power to alter the way we perceive objects. As a massive simplification, there are two way in which the molecules in the air can affect our vision.
Out-Scattering
The most obvious way in which air molecules interact with light is by deflecting it, changing its direction. If a ray of light directed to hit the camera is deflected away, we are in front of a process called out-scattering.

A real light source can emit quadrillions of photons each second, and each one has a certain probability of hitting an air molecule. The denser the medium in which light travels, the more likely it is for a single photon to be deflected. How severely out-scattering affects light also depends on the distance travelled.

Out-scattering causes light to become progressively dimmer, and it depends on both the distance travelled and the air density.
❓ Why do particles change the direction of light?In-Scattering
When light is deflected by a particle, it could also happen that is re-directed towards the camera. This is effectively the opposite of out-scattering and, unsurprisingly, is called in-scattering.
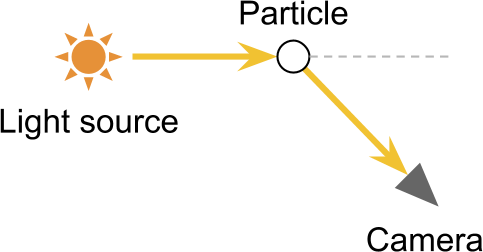
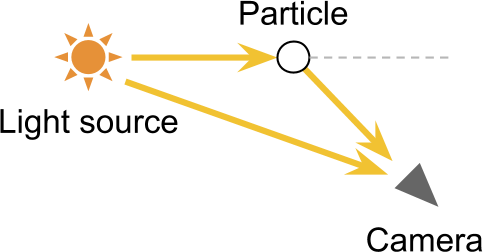
Under certain conditions, in-scattering allows seeing light sources that are not in the camera’s direct light of sight. Its most obvious optical effect results in light halos around light sources. They are caused by the fact the camera receives both direct and indirect light rays from the same source, de-facto amplifying the number of photons received.
Volumetric Single Scattering
A single ray of light can be deflected an arbitrary number of times. This means that light can travel very complex paths before reaching the camera. This poses a significant challenge, since rendering translucent materials with high fidelity requires to simulate the path of each individual ray of light. This is called raytracing, and is currently computationally too expensive for real-time rendering. The technique presented in this tutorial is referred as single scattering, since it takes into account only a single scattering event for a ray of light. We will see later how such a simplification still allows obtaining realistic results at a fraction of the cost that real raytracing would have.
The key to rendering realistic skies is to simulate what happens to light rays when they travel through a planet’s atmosphere. The diagram below shows a camera, looking through a planet. The basic idea behind this rendering technique is to calculate how light travelling from ![]() to
to ![]() is affected by scattering. This means calculating the contributions that out- and in-scattering have on the light travelling towards the camera. As discussed before, we experience as attenuation due to out-scattering. The amount of light present at each point
is affected by scattering. This means calculating the contributions that out- and in-scattering have on the light travelling towards the camera. As discussed before, we experience as attenuation due to out-scattering. The amount of light present at each point ![]() has a small chance of being deflected away from the camera.
has a small chance of being deflected away from the camera.
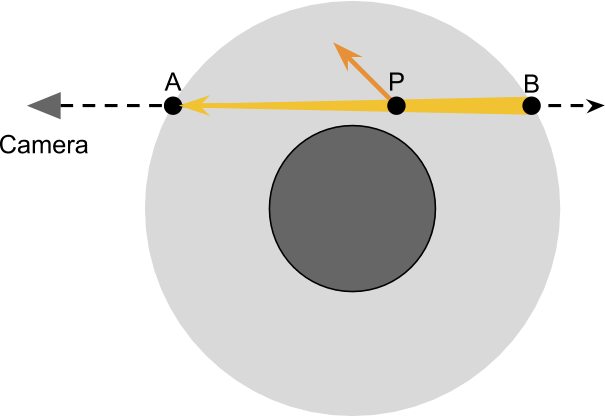
To correctly account for how much out-scattering occurs at each point ![]() , we first need to know how much light was present at
, we first need to know how much light was present at ![]() in the first place. Assuming there’s only a single star illuminating the planet, all light that
in the first place. Assuming there’s only a single star illuminating the planet, all light that ![]() receives must come from the sun. Some of that light will be subjected to in-scattering, and is accidentally deflected towards the camera:
receives must come from the sun. Some of that light will be subjected to in-scattering, and is accidentally deflected towards the camera:
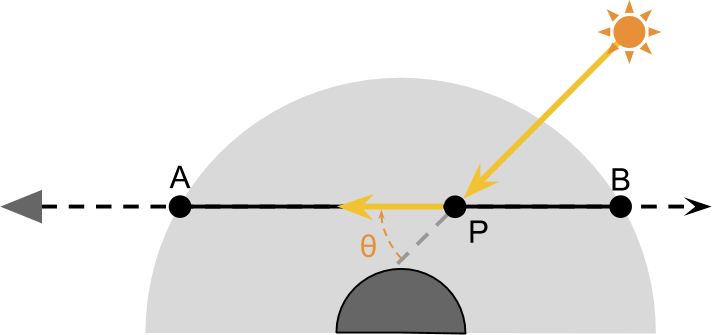
These two steps are enough to approximate most effects that can be observed in the atmosphere. However, things are compilated by the fact that the amount of light that ![]() receives from the sun is itself subjected to out-scattering while travelling through the atmosphere from
receives from the sun is itself subjected to out-scattering while travelling through the atmosphere from ![]() to
to ![]() .
.

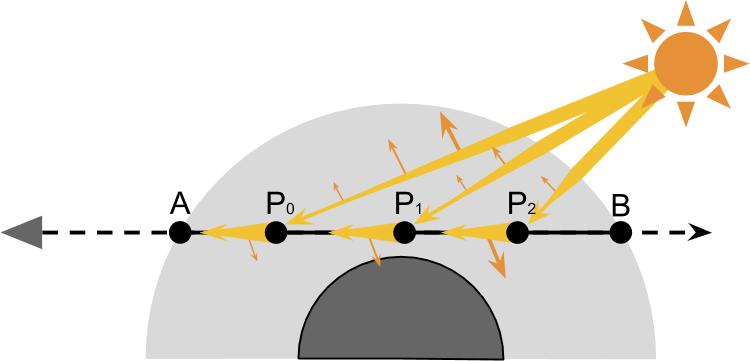
To sum up what we have to do:
- The line of sight of the camera enters the atmosphere at
 , and exists it at
  ;
; - As an approximation, we take into account the contributions of out- and in-scattering as it happens through each point
 ;
; - The amount of light
 receives comes from the sun;
 - The amount of light
 receives is subjected to out-scattering, as it travels through the atmosphere
  ;
; - A part of the light received by
 is subjected to in-scattering, which sends in the direction of the camera;
 - A part of the light from
 that is directed towards the camera is subjected to out-scattering and deflected away from the line of sight.
However, there are many more paths that light rays can take to reach the camera. For instance, one of the rays scattered away on its way to ![]() can be scattered back towards the camera in a second collision (diagram below). And there could be rays that reach the camera after being deflected three times. Or four.
can be scattered back towards the camera in a second collision (diagram below). And there could be rays that reach the camera after being deflected three times. Or four.

This technique is called single scattering because it only takes into account the in-scattering that occurs along the line of sight. More advanced techniques can extend this process taking into account other ways in which light can reach the camera. The number of possible paths, however, grows exponentially with the number of scattering events that are taking into consideration. Luckily enough, the probability of hitting the camera also decay exponentially.
Coming Next…
This post introduces the main concepts necessary to create a volumetric shader that reproduces atmospheric scattering. In the next post, we will start formalising these processes.
I hope you will stay with me on this journey through the atmosphere.
You can find all the post in this series here:
- Part 1. Volumetric Atmospheric Scattering
- Part 2. The Theory Behind Atmospheric Scattering
- Part 3. The Mathematics of Rayleigh Scattering
- Part 4. A Journey Through the Atmosphere
- Part 5. A Shader for the Atmospheric Sphere
- Part 6. Intersecting The Atmosphere
- Part 7. Atmospheric Scattering Shader
- 🔒 Part 8. An Introduction to Mie Theory
Other Resources
- Scratchpixel 2.0: Simulating the Colors of the Sky
- GPU Gems: Accurate Atmospheric Scattering
- Atom’s World: Flexible Physical Accurate Atmosphere Scattering
Download
Become a Patron!
You can download all the assets necessary to reproduce the volumetric atmospheric scattering presented in this tutorial.
| Feature | Standard | Premium |
| Volumetric Shader | ✅ | ✅ |
| Clouds Support | ❌ | ✅ |
| Day & Night Cycle | ❌ | ✅ |
| Earth 8K | ✅ | ✅ |
| Mars 8K | ❌ | ✅ |
| Venus 8K | ❌ | ✅ |
| Neptune 2K | ❌ | ✅ |
| Postprocessing | ❌ | ✅ |
| Download | Standard | Premium |
💖 Support this blog
This website exists thanks to the contribution of patrons on Patreon. If you think these posts have either helped or inspired you, please consider supporting this blog.
📧 Stay updated
You will be notified when a new tutorial is released!
📝 Licensing
You are free to use, adapt and build upon this tutorial for your own projects (even commercially) as long as you credit me.
You are not allowed to redistribute the content of this tutorial on other platforms, especially the parts that are only available on Patreon.
If the knowledge you have gained had a significant impact on your project, a mention in the credit would be very appreciated. ❤️🧔🏻



Hey Alan, I am super excited for this tutorial. one thing I noticed is the cheat sheet seems to be a deadlink.
Oh yeah, sorry about that!
I haven’t finished that yet hehe!
One year later and the link to the cheatsheet is still dead!
Hi Jeremiah!
Sorry about that. I prioritise the content that is most requested, and unfortunately there have been other topics that my audience have strongly requested. I understand this might be frustrating, but it takes an incredibly long amount of time to create quality content, so I try to focus on what is most requested at any given time.
3 years since, and the link is still dead.
his “prioritized content” is streaming crap about Minecraft and other games. he’s not interested in completing anything it appears.
You’d think in 3 years, you guys would have figured it our for yourselves.
this tutorial helps me a lot!!!
Awesome! Thanks for your atricle.