
This is the first part of the tutorial on iridescence. This new series will explore the very nature of light, in order to understand and to replicate how material exhibits colourful reflections. The tutorial is oriented to Unity game developers, although the techniques described can be easily implemented in other languages, including Unreal and WebGL.vi
You can find the complete series here:
- Part 1. The Nature of Light
- Part 2. Improving the Rainbow (Part 1)
- Part 3. Improving the Rainbow (Part 2)
- Part 4. Understanding Diffraction Grating
- Part 5. The Mathematics of Diffraction Grating
- Part 6. CD-ROM Shader: Diffraction Grating (Part 1)
- Part 7. CD-ROM Shader: Diffraction Grating (Part 2)
- Part 8. Iridescence on Mobile
- Part 9. The Mathematics of Thin-Film Interference
- Part 10. Car Paint Shader: Thin-Film Interference
Introduction
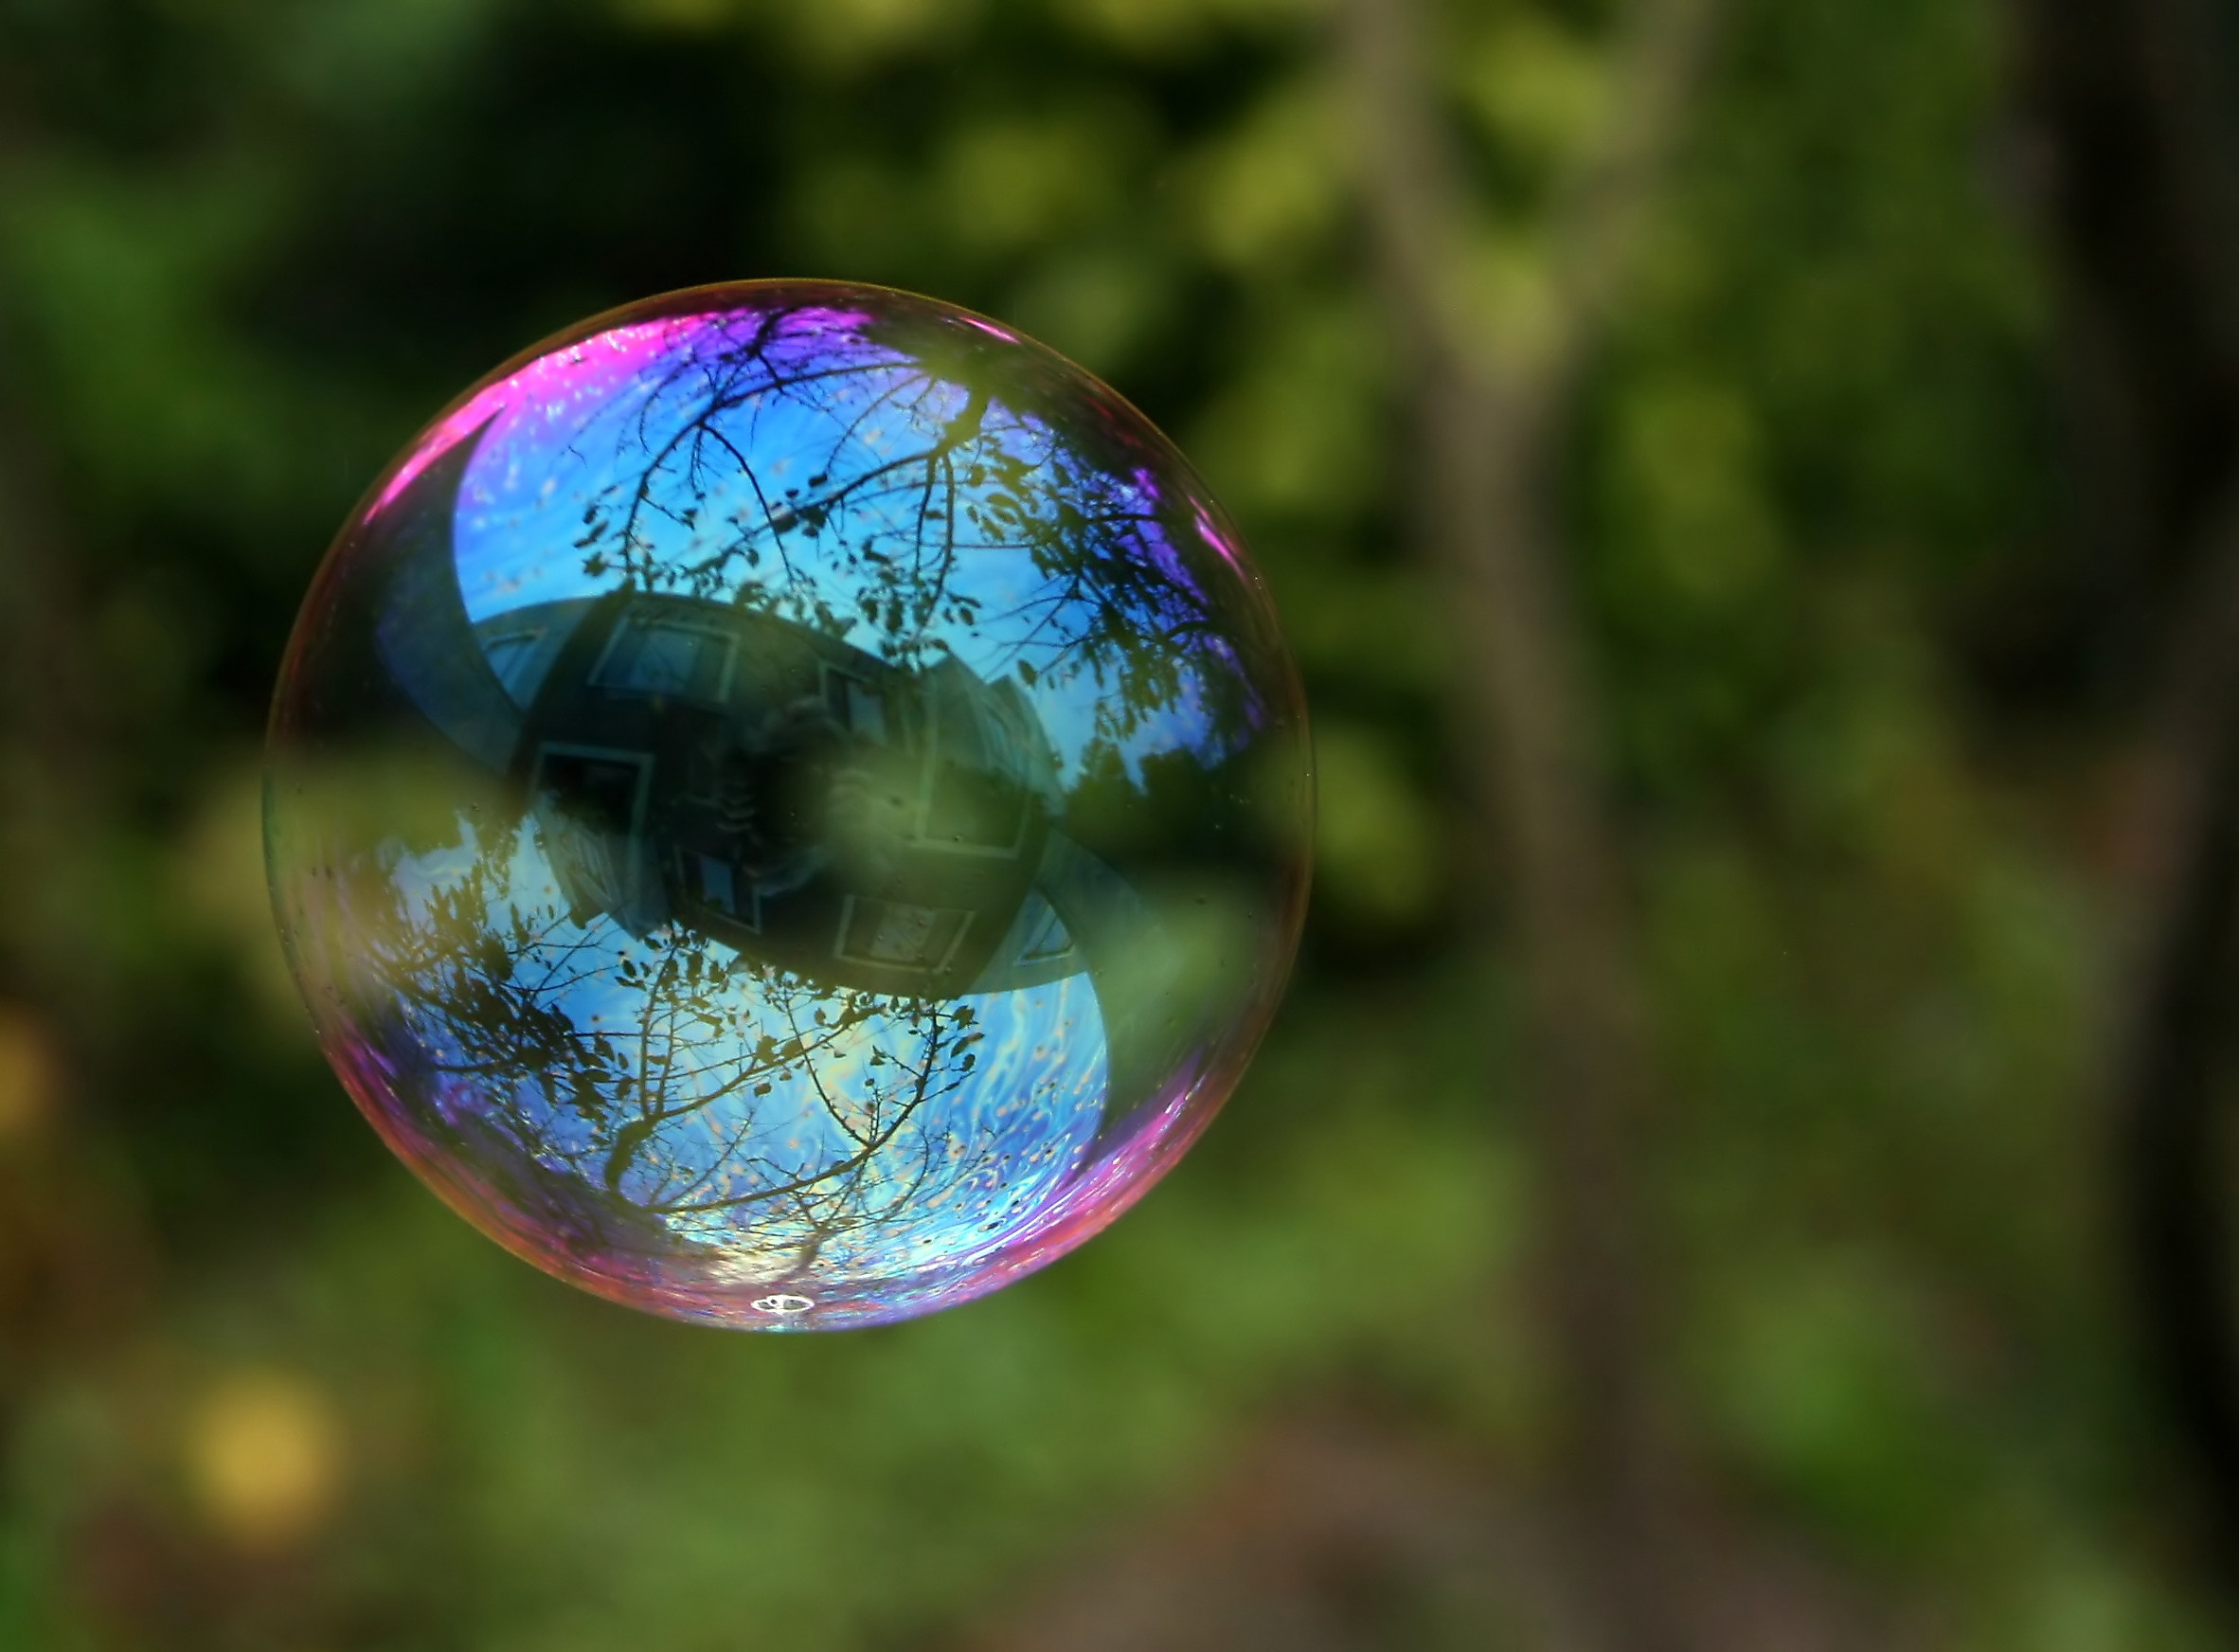
Iridescence is an optical phenomenon which causes objects to change colour as the angle of illumination or the angle of view changes. It is because of this effect that bubbles appear to display such a variety of colours.
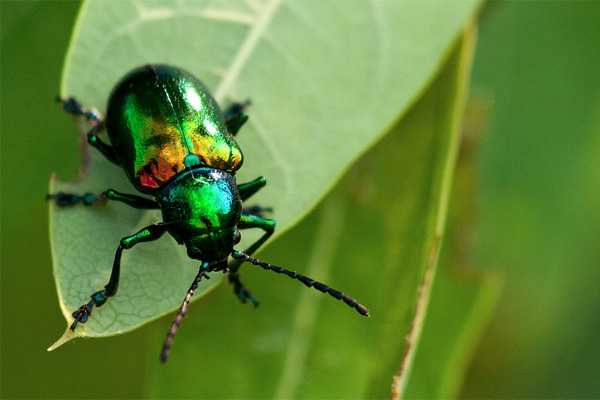
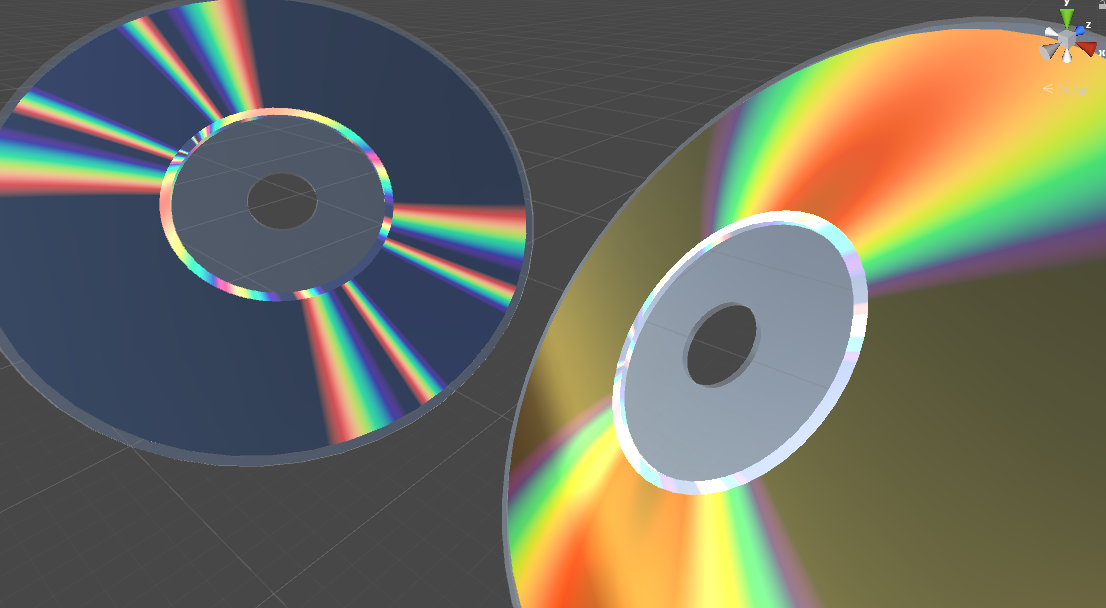
Iridescence can also occur on spilt oil, CD-ROMs, and even on fresh meat. Many insects and animals use iridescence to create colours, without the need for actual pigments.
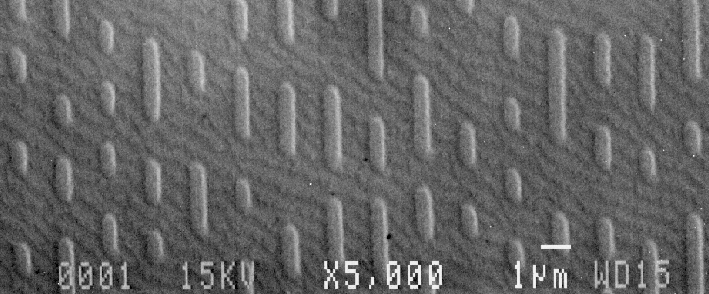
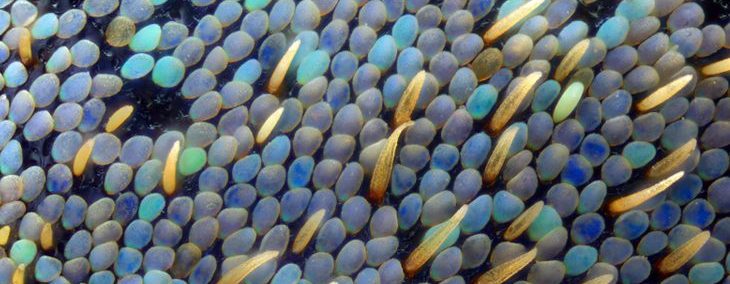
This is because iridescence occurs from the interaction between light and the microscopic structures that all those things have on their surfaces. Both the tracks of a CD-ROM and the scales of an insect’s exoskeleton (images below by Nikola Rahmé) are on the same order of magnitude of the wavelengths of light they interact with. Iridescence, in fact, is possibly the first phenomenon to be discovered that really betrayed light’s real nature as a wave. We cannot either explain or reproduce iridescence without first understanding what light really is, how it works and how is perceived by the human eye.
The Nature of Light
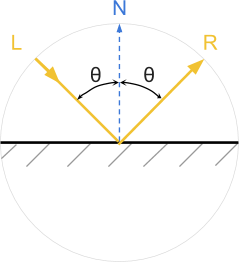
Like most subatomic particles, light simultaneously exhibits behaviours that are commonly associated with particles and waves. It is not uncommon to see light modelled as either one of those. For most applications, light can be seen as made of trillions of individual particles, called photons. Most shaders, for instance, assume photons behave like tiny billiard balls, bouncing on objects with the same angle they hit them (diagram below).
But light can also be modelled as a wave. While physicists will be familiar with this concept, developers might not. So let’s spend some time trying to understand what it means for light to be a wave.
We’re all familiar with ocean waves. Each point on the surface of the ocean has a height. The higher it is from its average value, the larger a wave is. Once the surface of the water is disturbed, waves keep propagating through the ocean until their energy is dissipated.
Light is a wave, but instead of being measured as the height of a water surface, it is then defined as the energy that the electromagnetic field possesses at any given point. Under this model, light is a disturbance in the electromagnetic field, which propagates through space. We can imagine a light bulb either causing a wave, or emitting many photons all around itself.

The amount of energy a photon carries determines the colour of the light. Photons with lower energy are perceived as red; photons with higher energy are perceived as violet. Waves have a property that is analogous to the energy their particle counterpart possess: a wavelength. Intuitively, that is the distance between two peaks in the wave.
Light always travels at the same speed (approximately 299,792,458 metres per second), meaning that electromagnetic waves all propagate at the same speed. While their speed is fixed, their wavelengths vary. Photons with higher energy are waves with a shorter wavelength. It is the wavelength of a light wave that ultimately determines its colour.

As it can be seen in the diagram above, the human eye can perceive photons with an associated wavelength ranging from approximately 700 nanometers to 400 nanometers. A nanometre is a billionth of a meter.
❓ How small is a nanometer?
When approaching the smallest scale at which Nature works, it can be hard to get a grasp of the sizes we are discussing. The average human person is approximately 1.6 metres tall. The width of a human hair is around 50 micrometres (50 μm). A micrometre is a millionth of a meter (1 μm = 0.000001 metres =  metres). A nanometer is a thousandth of a micrometre (1 nm = 0.000000001 metres =
  metres). So, the wavelength of visible light is approximately one-hundredth the width of a human hair.
What’s next?
After this brief introduction, the rest of this tutorial will focus on understanding and implement iridescence in Unity.
- Improving the Rainbow. As we have said before, different wavelengths of light are perceived as different colours by the human eye. The next two posts will focus on how to associate those wavelengths to RGB colours. That step is essential to replicate iridescent reflections with a high degree of accuracy. Those posts also introduce a novel approach that is both physically accurate and computationally efficient.
- Diffraction Grating. Part 4 and 5 of this series will focus on diffraction grating. That is the technical name of one of the effects that cause materials to exhibit iridescent reflections. Despite being very technical, the derived equation that governs this optical phenomenon is very simple. Feel free to skip Part 5 if you are not interested in the Mathematics behind diffraction grating.
- CD-ROM Shader. The core of this series is the actual CD-ROM Shader. It uses the knowledge gathered in the previous posts to finally implement diffraction grating in Unity. It extends the Standard Surface shader of Unity 5; making this effect both physically based and photorealistic. With very little effort you can change it to fit other types of iridescent reflections based on diffraction grating. An additional post will show how this technique can be implemented on mobile devices in a very efficient way.
- Thin-Film Interference. Diffraction grating is not the only way in which iridescence can occur. Thin-Film Interference is another physical phenomenon that can split white light into its components, causing iridescent reflections to appear. This is what gives bubble and spilt oil stains their typical appearance. Once again, we will investigate the Mathematical foundations of this optical phenomenon to derive physically based equations for our shaders.
I hope you will stay with me through this journey into one of the most beautiful phenomena that materials exhibit.
Conclusion
This post introduced the new series on iridescence. The rest of this series will explore how to simulate and implement iridescent reflections on a variety of materials. From bubble to CD-ROMs, from spilt oil to insects.
You can find the complete series here:
- Part 1. The Nature of Light
- Part 2. Improving the Rainbow (Part 1)
- Part 3. Improving the Rainbow (Part 2)
- Part 4. Understanding Diffraction Grating
- Part 5. The Mathematics of Diffraction Grating
- Part 6. CD-ROM Shader: Diffraction Grating (Part 1)
- Part 7. CD-ROM Shader: Diffraction Grating (Part 2)
- Part 8. Iridescence on Mobile
- Part 9. The Mathematics of Thin-Film Interference
- Part 10. Car Paint Shader: Thin-Film Interference
Become a Patron!
You can download the Unity package for the CD-ROM Shader effect on Patreon.
Leave a Reply