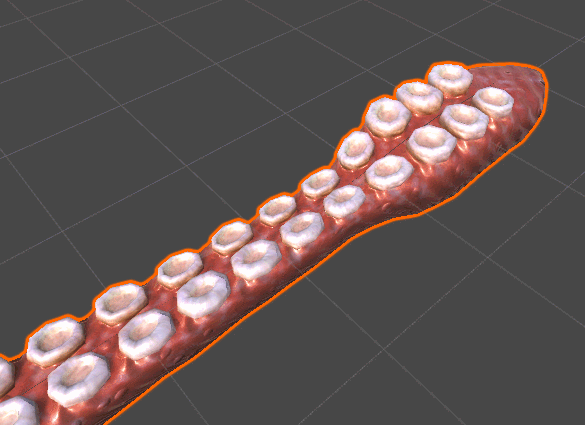
Following the unexpected success of the tutorial on Inverse Kinematics for Tentacles, I have decided to share the shader that I used to make them so realistic.
If you are not familiar with shaders, fear not. This tutorial will be target at beginners, and you’ll only need a basic understanding of how Unity works.
Introduction
Part 1. Creating a new Shader
Part 2. Refitting the Shader
Part 3. Normal Extrusion
Part 4. Sucker Waves
Part 5. Selective Extrusion
Conclusion & Download
A link to download the full Unity package for this tutorial is provided at the end.
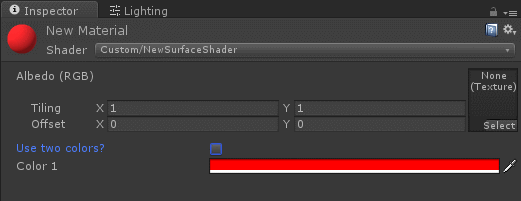
This is a tutorial for Unity 5: Unity 4 used MaterialEditor (legacy documentation here) to customise a material’s inspector. That is now deprecated; you should use the new ShaderGUI (documentation here) instead.
This post shows how to use arrays and shaders in Unity 5.4. Back in January I already covered this topic in an article called Arrays & shaders: Heatmaps in Unity. My original approach exposed an undocumented feature that allowed to pass arrays to shaders. Since then, Unity 5.4 has introduced proper support in its API. This tutorial replaces the previous article. If you have read the previous tutorial, you do not need any changes to your shader code and you can skip to Step 2.
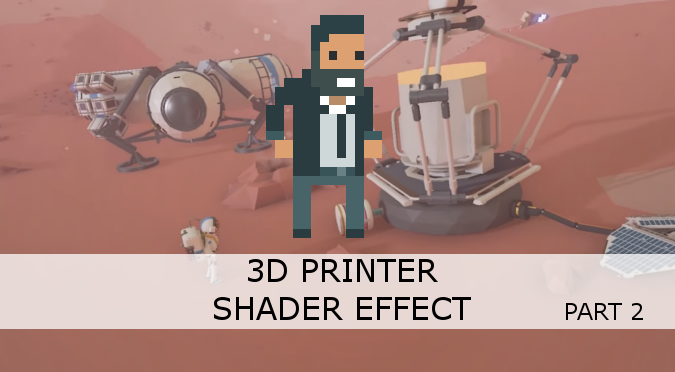
This tutorial will recreate the 3D printer effect seen in games such as Astroneer and Planetary Annihilation. It’s an interesting effect that shows an object in the process of being created. Despite looking simple, there are many challenges that are far from being trivial.
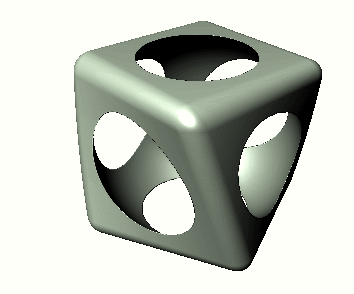
This tutorial explains how to create complex 3D shapes inside volumetric shaders. Signed Distance Functions (often referred to as Fields) are mathematical tools used to describe geometrical shapes such as spheres, boxes and tori. Compared to traditional 3D models made out of triangles, signed distance functions provide virtually infinite resolution, and are amenable to geometric manipulation. The following animation, from formulanimation tutorial :: making a snail, shows how a snail can be created using simpler shapes:
This third instalment on Volumetric Rendering will explain how to shade volumes in a realistic fashion. This essential step is what gives three-dimensionality to the flat, unlit shapes that have been generated so far with raymarching.
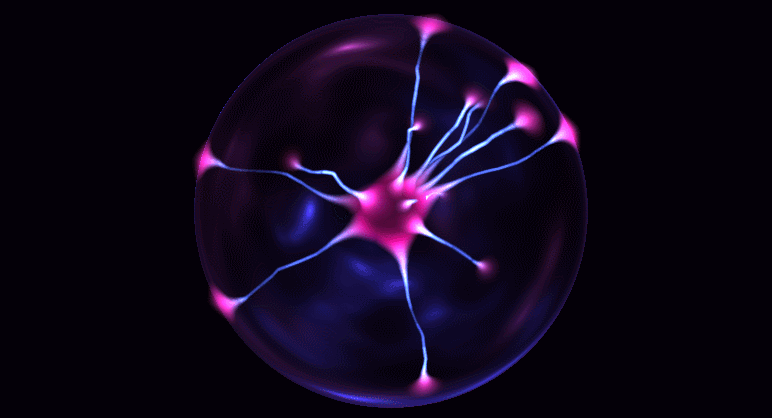
This is the first part of a Unity tutorial dedicated to Volumetric Rendering, raymarching and signed distance fields. These techniques allow us to overcome the biggest limitation of modern 3D engines, which only let us render the outer shell of an object. Volumetric rendering enables the creation of realistic materials that interact with light in a complex way, such as fog, smoke, water and glass. Beautifully crafted effects such as NMZ‘s Plasma Globe (below) would simply be impossible without volumetric rendering.
These techniques are not complicated, but require a lot of steps in order to replicate the aforementioned effects. This tutorial has got you covered.
Part 1: Volumetric Rendering| An introduction to what rendering volume means, and how it can be done in Unity;
Part 2: Raymarching | Focuses on the implementation of distance-aided raymarching, the de-fact standard technique to render volumes;
Part 3: Surface Shading| A comprehensive guide on how to shade volumes realistically;
Part 4: Signed Distance Functions | An in-depth discussion of the mathematical tools that allow us to generate and combine arbitrary volumes;
Part 5: Ambient Occlusion | How to implement realistic and efficient ambient occlusion in your volumes;
This first part will provide a general introduction to volumetric rendering, and end with a simple shader that will be the base of all our future iterations:
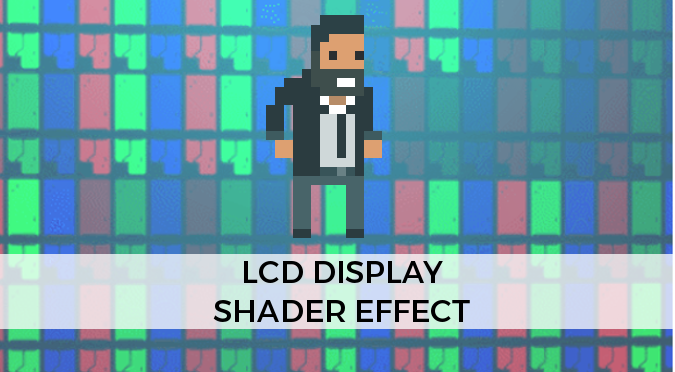
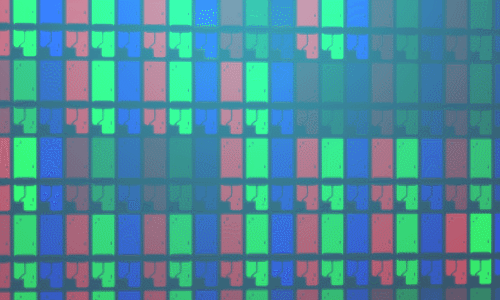
This tutorial will show how to create a realistic shader that simulate the look and feeling of LCD displays. Developer Monomi Park has recently announced (link) a new update to their game Slime Rancher. One of the most intriguing cosmetic effect that is going to be added is a special LCD shader that makes monitors look pixelated when you’re close to them. The effect was so cool that I simply had to recreate it.