
This tutorial continues our journey into the fascinating subject of volumetric rendering. This time, we will cover how to simulate ambient occlusion.
You can find here all the other posts in this series:
- Part 1: Volumetric Rendering
- Part 2: Raymarching
- Part 3: Surface Shading
- Part 4: Signed Distance Fields
- Part 5: Ambient Occlusion
- 🚧 Part 6: Hard and Soft Shadows
The full Unity package is available at the end of this article. 📦
Quick Ambient Occlusion
fixed4 raymarch (float3 position, float3 direction)
{
	for (int i = 0; i < _Steps; i++)
	{
		float distance = map(position);
		if (distance < _MinDistance)
		{
			fixed4 color = renderSurface(position, direction);
			float ao = 1 - float(i) / (_Steps-1);
			color.rgb *= ao;
			return color;
		}

		position += distance * direction;
	}
	return fixed4(1,1,1,1);
}
The following animation shows a complex geometry being rotated and sliced at the same time. The right part is rendered in white; the shade on the left side indicates how many steps were required by the raymarching loop to touch the surface.
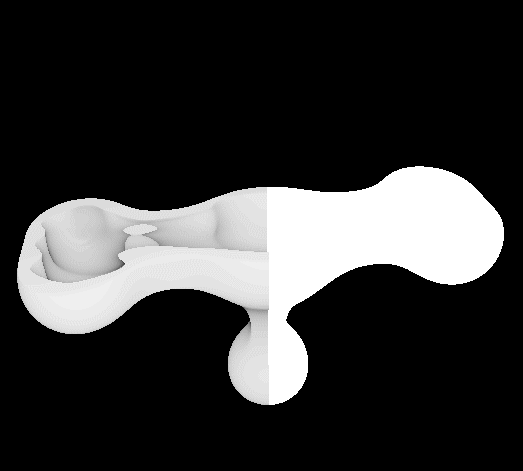
This information does not require any additional computation, and is already a good estimation for the ambient occlusion.
Real Ambient Occlusion
This solution provides a nice, yet not very reliable measure for space occlusion. Alex Evans came up with a much better solution (link here). The idea behind it is to sample the distance field along the normal direction. If no closer object is found, it is a good indication that the surrounding area is free from obstacles.
For more reliable results, we repeat this process for _AOStepSize times, each time going _AOStepSize units further away from the surface. If no closer object is found, the sum of the sampled distances will be equal to _AOStep * _AOStepSize. This gives us a value we can interpolate from, resulting in an ambient occlusion coefficient that goes from 0 to 1.
float ambientOcclusion (float3 pos, float3 normal)
{
    float sum = 0;
    for (int i = 0; i < _AOSteps; i ++)
    {
        float3 p = pos + normal * (i+1) * _AOStepSize;
        sum    += map(p);
    }

    return sum / (_AOStep * _AOStepSize);
}
This solution is sensibly slower than the cheap ambient occlusion presented in the previous section. However, it does not depend on the distance from the camera and is much easier to control.
Exponential Decay
A more realistic improvement can be obtained by weighing those samples differently. The further away we are from the original point, the less importance we give to the sample. We can do this by introducing an exponential decay:
float ambientOcclusion (float3 pos, float3 normal)
{
    float sum    = 0;
    float maxSum = 0;
    for (int i = 0; i < _AOSteps; i ++)
    {
        float3 p = pos + normal * (i+1) * _AOStepSize;
        sum    += 1. / pow(2., i) * map(p);
        maxSum += 1. / pow(2., i) * (i+1) * _AOStepSize;
    }

    return sum / maxSum;
}
If we found no closer point, then sum is equal to maxSum. Their fraction is 1, which indicates no occlusion. The smaller sum is, the more occlusion we have. The following animation shows only the contribution from ambient occlusion:
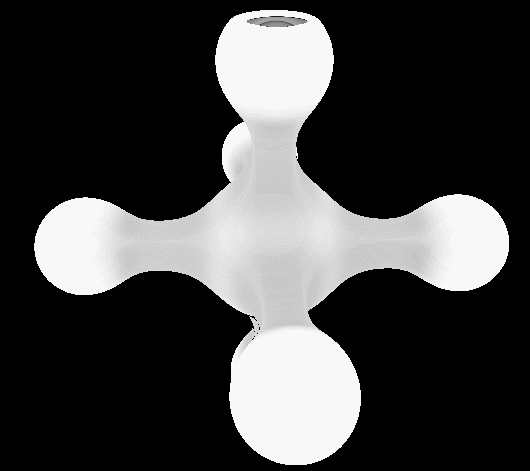
It’s clear that, compared to the previous animation, the internal ridges of the geometries are shaded in a much more realistic way.
What’s next…
This article introduced different techniques to simulate ambient occlusion in volumetric rendering.
You can find the full list of articles in the series here:
- Part 1: Volumetric Rendering
- Part 2: Raymarching
- Part 3: Surface Shading
- Part 4: Signed Distance Fields
- Part 5: Ambient Occlusion
- 🚧 Part 6: Hard and Soft Shadows
⚠ Part 6 of this series is available for preview on Patreon, as its written content needs to be completed.
If you are interested in volumetric rendering for non-solid materials (clouds, smoke, …) or transparent ones (water, glass, …) the topic is resumed in detail in the Atmospheric Volumetric Scattering series!
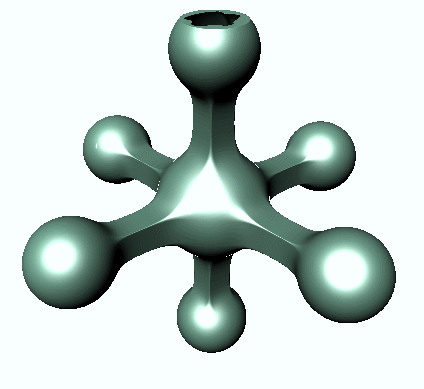
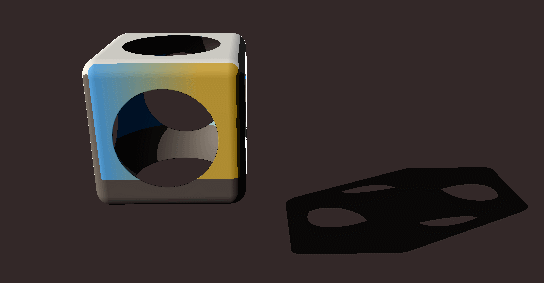
By the end of this series you’ll be able to create objects like this one, with just three lines of code and a volumetric shader:
Download Unity Package 📦
Become a Patron!The Unity package contains everything needed to replicate the visual seen in this tutorial, including the shader code, the assets and the scene.
Leave a Reply