
It is undeniable that user generated content is getting more and more relevant for games. When a player has the power to create their own content , they engage with the game in a completely new way. But if you’re a developer, you should know that creating a proper level editor can be even more time consuming that creating the game itself. Giving players the chance to create content is not enough: it has to be fun. On top of that, level editors need to be intuitive, or players won’t be able to use them properly. The best solution is a trade off between giving players the power to create whatever they want, and the need to simplify it.
 A perfect example of this is Valve’s Puzzle Creator, which beautifully captures the essence of Portal’s gameplay. There is no space for scripting or custom events, making most of the original levels from Portal impossible to replicate. Valve has made a very clear design choice: they add constraints, but in a way that guide players’ creativity.
This post go through some of the challenged I encountered while working on the level editor for 0RBITALIS, and how I solved them. I will show in the second part how the editor actually works.
The style of the editor
0RBITALIS is a gravity simulator disguised as a puzzle game. It is not surprising that since its very first release, players asked for a level editor. 0RBITALIS has a very unique style, and the entire game contains little (if any) text at all. I wanted the level editor to be based on the same logic, with as little text as possible. I also wanted something different: the game heavily uses red and black, and this was the perfect chance to show something completely different, yet still coherent.
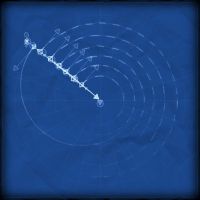
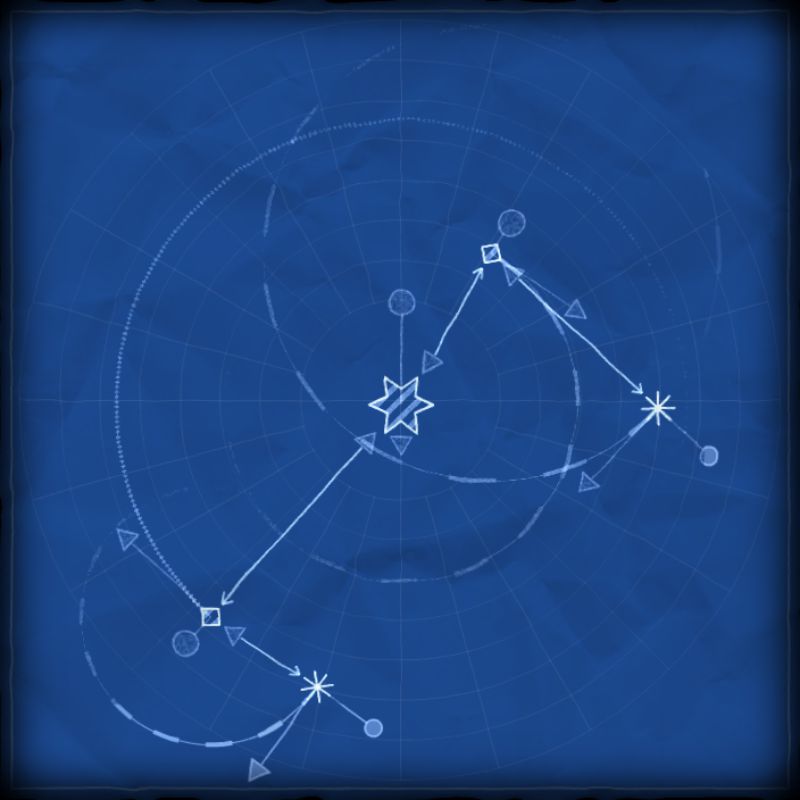
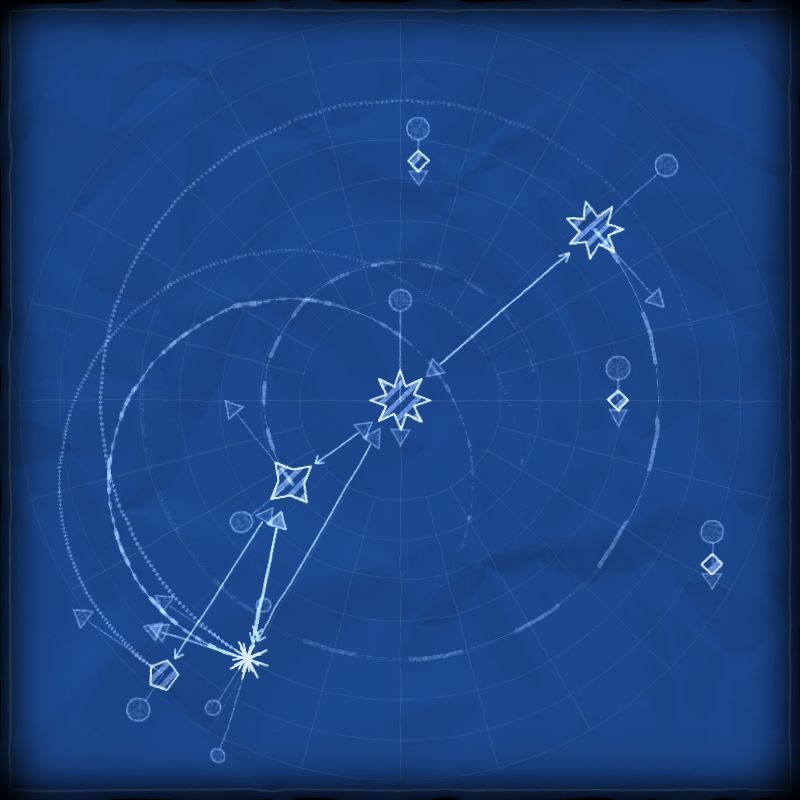
 In a game about gravity, being able to understand how planets will move is essential. Unfortunately it turns out that a single screenshot from the game doesn’t give many clues on how objects are moving. This encouraged me to design the editor in a way that made orbital mechanics obvious even with just a glance. I added links between gravitationally bounded bodies, and drawn orbits using a dashed line. Every dash takes exactly a second to be covered by the planet, giving visual clues about the orbital speed and direction.
Designing the controls
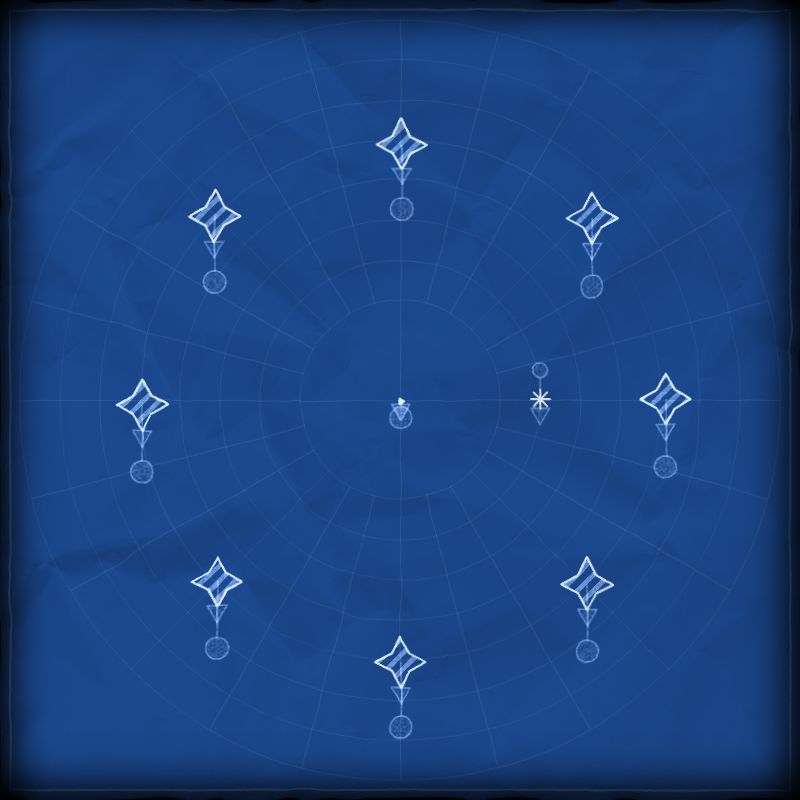
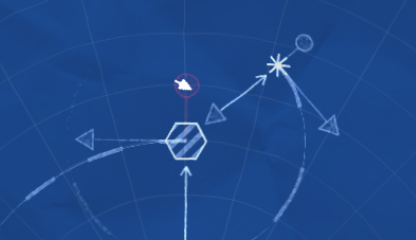 The biggest challenge has been designing a set of tools which allowed players to manipulate planets (and their orbits) without any text or traditional menu. I decided to go with handles: they stick out of planets, and players can drag them to alter their solar system (see picture). There is no indication about what they do, but this is in line with the style of the game: everything in 0RBITALIS has to be a discovery, and I want players to try and play with the interface.
Limitations and constraints
Despite its minimalistic aesthetic, 0RBITALIS has quite a lot of content. It was pretty much clear that bringing it all to the editor would have been a real challenge. I decided to include enough content to allow players to create interesting levels. But at the same time, I skimmed most of the eye candies and the minor features, making the editor much more intuitive and easy to use. Some of the features which I decided to skim from the editor are: elliptical and Lissajous orbits; comets, pulsars, teleports, nebulae; enemies and missiles; destructible planets; coloured planets and stars; scanning and landing missions and, finally, scripted events.
There is another important limitation which I decided to turn into a feature: the mass of an object depends only on its size. This allowed me to condense asteroids, planets, gas giants and stars into a single object. Conceptually, they are the same thing: the only difference is their mass. It takes only a glance to realise how massive objects are, just by looking at their size.
When you are working on a game there is always a trade off between the amount of work you put into it, and the money it will make. I believe that removing those features was the right choice; implementing them is a time investment which I believe I would have not recouped easily.
Part 2: How the editor works
You can access the editor from the title screen of 0RBITALIS. The first screen will show a list of your previously created levels. You can select each one individually to edit it, or creating an entirely new one.
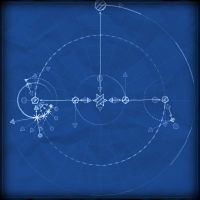
When working on a level, it will appear as a blueprint. There are three classes of objects available: planets, stars and probes. When a planet is orbiting a star, an arrow will link them. Orbital paths are also drawn with a dotted line. In the editor, the mass of an object is always proportional to its size. I tested this style both on new and experienced players: they all understood the editor correctly, providing they knew how the game works.
Move an object
You can move every object just by dragging it to the position you want. This will automatically determine their initial angle and orbital distance when the level starts. If other objects are orbiting the planet you’re moving, they relative angle and position will be preserved.
Make an orbit
Objects that are not connected to anything are called stationary. They will not move when the game starts. If you want them to orbit around a planet or a star, you have to drag the down arrow onto it. You can only orbit around objects which are highlighted in red. You can drag the arrow onto the body itself to make it stationary again.
Change the orbital speed
You can change the time it takes for an object to complete is orbit using its speed arrow. This determines the speed of the object, which is visualised by its orbit. Each arc represent a second: the more arcs, the slower it is. You can invert the orbital speed, to make your object orbiting clockwise or anticlockwise.
Change the mass
Planets and star are actually the same object in 0RBITALIS. What it changes is their mass. You can use the mass handler to change the mass of an object. This will affect both its size and the way it is rendered. Small objects are asteroids, they then become rock planets, gas giants and finally stars. You can also invert the direction of the mass handler, giving planets and probes a negative mass. Negative gravity will repel standard probes, but attract anti-probes.
Creating a new object
On the top right corner of the screen there are two buttons. The first one create a new celestial body (a planet or a star), the second a new probe (that thing you launch). Object are positioned randomly, but you can drag them to the position you want.
Destroy an object
To destroy an object, simply drag it into the top left corner. If something is attached to it, it will be destroyed as well. Every level should always at least one probe; you cannot delete an orbital tree if this would leave you with no probes.
How to play user generated levels
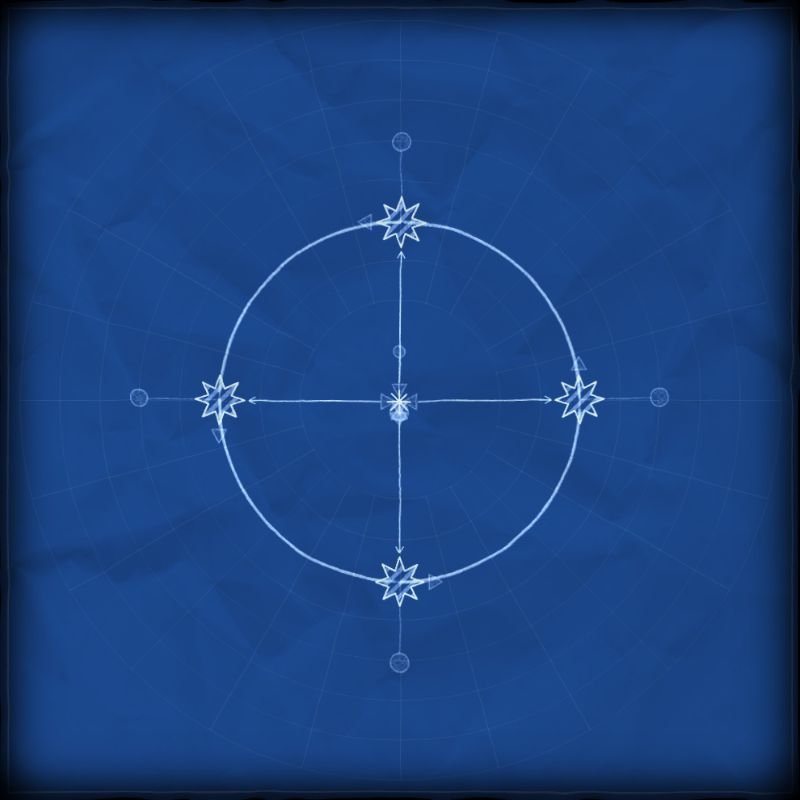
Once saved, levels are available in the Steam Workshop. If you find a level you like, click on the “Subscribe” button and it will be available in the in-game “Workshop” screen. These are some of my favourite levels so far…
 |
 |
 |
 |
 |
 |
Conclusion
Designing the editor for 0RBITALIS was a real challenge; overall, I am very pleased with the result and I believe making it was the right choice. Level editors can be very hard not just to create but also to integrate with Steam. Before embarking on such a quest, make sure that what you are doing meets the players needs and expectations. Not every game requires a level editor. And even for the ones who do, it does not automatically means it will increase their revenue. Depending on the type of game you have, you should also be careful about what users are creating: this wasn’t a problem for 0RBITALIS, but many games have a Time To Penis which is less than a minute.
💖 Support this blog
This website exists thanks to the contribution of patrons on Patreon. If you think these posts have either helped or inspired you, please consider supporting this blog.
📧 Stay updated
You will be notified when a new tutorial is released!
📝 Licensing
You are free to use, adapt and build upon this tutorial for your own projects (even commercially) as long as you credit me.
You are not allowed to redistribute the content of this tutorial on other platforms, especially the parts that are only available on Patreon.
If the knowledge you have gained had a significant impact on your project, a mention in the credit would be very appreciated. ❤️🧔🏻