

This tutorial explains how to pass arrays to shaders in Unity. This feature has been present for a long time, but is mostly undocumented. Unity 5.4.0 Beta 1 will introduce a proper API to pass arrays to shaders; this technique however will work with any previous version.
- Introduction
- Step 1: The arrays
- Step 2: The shader
- Step 3: The C# code
- Step 4: A more general approach
- Conclusion & download
If you are using Unity 5.4+, please refer to the Arrays & Shaders in Unity 5.4+ tutorial.
Introduction
One of the characteristic which makes shaders hard to master is the lack of a proper documentation. Most developers learn shaders by messing up with the code, without having a deep knowledge of what’s going on. The problem is amplified by the fact that Cg / HLSL makes lot of assumptions, some of which are not properly advertised. Unity3D allows C# scripts to communicate to shaders using methods such as SetFloat, SetInt, SetVector and so on. Unfortunately, Unity3D doesn’t have a SetArray property method, which led many developers to believe Cg / HLSL doesn’t support arrays either. Which is not true. This post will show how is possible to pass arrays to shaders. Just remember that GPUs are highly optimised for parallel computations, and that using for loops within a shader will dramatically drops its performance.
Step 1: The arrays
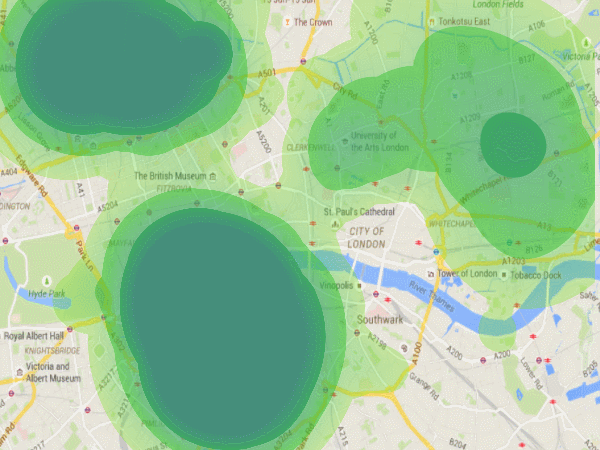
If you are familiar with heatmaps, you’ll know that they visualise the density of a certain phenomenon using a colour gradient. They are usually generated from a set of points, each one with its radius and intensity. There is no easy way to implement a heatmap in a shader, without using arrays. What we are going to do is to pass a list of points to the material, and iterate on each one to calculate its colour contribution for every pixel of the image. There are then three informations needed for each points: its position, its radius and its intensity. Since Unity3D doesn’t provide APIs to set arrays, they won’t be mentioned in the Properties section of the shader. Instead, they’ll be declared as the follow:
uniform int _Points_Length;		// How many points

uniform float3 _Points [100];		// The positions (x,y,z)
uniform float2 _Properties [100]	// The properties (x = radius, y = intensity)
Cg / HLSL doesn’t support arrays with variable size, so they need to be initialised with the maximum number of points (100, in this example). We also have to signal to the shader that these variables will be modified from outside, hence the uniform qualifier. As it happens in C, there is an extra variable which indicates how many points are actually used.
It’s possible to notice that instead of having three variables per each point, we only have two. This is due to a nasty bug feature of Cg which doesn’t allow arrays such as float _Intensities [100] to be accessed from outside the shader. All the arrays we want to access from C# must be packed arrays, such as float2, float3, and so on. For this reason, the radius and intensity of points will be packed, respectively, in the x and y fields of _Properties.
Step 2: The shader
The variables _Points and _Properties are actual arrays, so their elements can be accessed simply using the square bracket notation.
Shader "Example/Heatmap" {
	Properties {
		_HeatTex ("Texture", 2D) = "white" {}
	}
	SubShader {
		Tags {"Queue"="Transparent"}
		Blend SrcAlpha OneMinusSrcAlpha // Alpha blend

		Pass {
			CGPROGRAM
			#pragma vertex vert
			#pragma fragment frag

			struct vertInput {
				float4 pos : POSITION;
			};

			struct vertOutput {
				float4 pos : POSITION;
				fixed3 worldPos : TEXCOORD1;
			};

			vertOutput vert(vertInput input) {
				vertOutput o;
				o.pos = mul(UNITY_MATRIX_MVP, input.pos);
				o.worldPos = mul(_Object2World, input.pos).xyz;
				return o;
			}

			uniform int _Points_Length = 0;
			uniform float3 _Points [20];		// (x, y, z) = position
			uniform float2 _Properties [20];	// x = radius, y = intensity

			sampler2D _HeatTex;

			half4 frag(vertOutput output) : COLOR {
				// Loops over all the points
				half h = 0;
				for (int i = 0; i < _Points_Length; i ++)
				{
					// Calculates the contribution of each point
					half di = distance(output.worldPos, _Points[i].xyz);

					half ri = _Properties[i].x;
					half hi = 1 - saturate(di / ri);

					h += hi * _Properties[i].y;
				}

				// Converts (0-1) according to the heat texture
				h = saturate(h);
				half4 color = tex2D(_HeatTex, fixed2(h, 0.5));
				return color;
			}
			ENDCG
		}
	}
	Fallback "Diffuse"
}
For every pixel of the geometry, lines 41-47 calculate the heat contribution given from each point. The final heat, h, (ranging from 0 to 1) is then used to sample a texture which will determine the actual colour and opacity. Lines 6-7 are necessary if we want the geometry to support alpha transparency.
Step 3: The C# code
The only thing which is missing, is the initialisation of the arrays. On compilation, something magical happens: every cell of the array _Points[i] will be accessible from C# as _Pointsi. Armed with this knowledge, we can pass an array very easily to the shader:
using UnityEngine;
using System.Collections;

public class Heatmap : MonoBehaviour {

	public Vector3[] positions;
	public float[] radiuses;
	public float[] intensities;

	public Material material;

	void Start ()
	{
		material.SetInt("_Points_Length", positions.Length);
		for (int i = 0; i < positions.Length; i ++)
		{
			material.SetVector("_Points" + i.ToString(), positions[i]);

			Vector2 properties = new Vector2(radiuses[i], intensities[i]);
			material.SetVector("_Properties" + i.ToString(), properties);
		}
	}
}
All the public fields can be initialised directly from the inspector. The overall look of the heatmap can change dramatically just by playing a little bit with its heat texture. Using toom ramps generally yields visually pleasant results.

Step 4: A more general approach
To overcome the huge limitation Unity3D has when it comes to pass arrays to shaders, we can create a more general class.
using UnityEngine;
using System.Collections;

public class SetVector3Array : MonoBehaviour {
	public Material material;
	public string name;			// The name of the array
	public Vector3[] array;		// The values

	public void UpdatePoints()
	{
		// Requires an array called "[name]"
		// and another one called "[name]_Length"
		material.SetInt(name + "_Length", array.Length);
        for (int i = 0; i < array.Length; i++)
            material.SetVector(name + i.ToString(), array[i]);
	}
}
In order to work, it needs a material with a shader which contains an array. Its name must be specified in the string name. The shader must also have a variable with the same name of the array, followed by _Length.
Conclusion & download
Using arrays in Shader is possible with any recent version of Unity, due to a poorly documented feature. Official APIs are planned from Unity 5.4.0 Beta 1. The technique introduced in this tutorial is compatible with earlier versions.
Arrays can be used for a variety of reasons. They can be used to initiate hundreds of properties via scripting, without the need to expose each one of them individually.
You can download the complete Unity package for this project here.
Other resources
- Part 1. A Gentle Introduction to Shaders
- Part 2. Surface Shaders
- Part 3. Physically Based Rendering and Lighting Models
- Part 4. Vertex and Fragment Shaders
- Part 5. Screen Shaders and Image Effects
💖 Support this blog
This website exists thanks to the contribution of patrons on Patreon. If you think these posts have either helped or inspired you, please consider supporting this blog.
📧 Stay updated
You will be notified when a new tutorial is released!
📝 Licensing
You are free to use, adapt and build upon this tutorial for your own projects (even commercially) as long as you credit me.
You are not allowed to redistribute the content of this tutorial on other platforms, especially the parts that are only available on Patreon.
If the knowledge you have gained had a significant impact on your project, a mention in the credit would be very appreciated. ❤️🧔🏻
Hi!
Didn’t have the time to read the whole article yet, but something catched my eye and just wanted to comment that the next Unity version will support setting array properties on shaders:
“Shader uniform array support. Uniform arrays can be set by new array APIs on MaterialPropertyBlock. Maximum array size is 1023. The old way of setting array elements by using number-suffixed names is deprecated.”
Source: https://unity3d.com/es/unity/beta/unity5.4.0b1
Thanks for your amazing articles!
> Just remember that GPUs are highly optimised for parallel computations, and that using for loops within a shader will dramatically drops its performance.
Does this still hold true if we’re replacing 100 instanced shaders with one shader using an array of 100 points as in your example?
Each shader comes with its own overhead. I believe that 100 different shaders (each on in its own material) will be MUCH worse than a single shader with an array. This is also because different materials might require different draw calls. If you can use a single material to draw 100 things, go with that. :p (within reasons)
Quick question: I’ve noticed in a few tutorials that you make use of the Hidden/SHADER_NAME naming feature, but don’t understand how you are applying these shaders to materials. Would you mind enlightening me? Thanks!
Hey! I use that for a couple of reasons. First of all, I don’t want the list of my shaders to be too long. The second (and more important) reason is that some shaders are designed for a specific use or effect only. Hence, they should not be used elsewhere.
You can attach a Shader to a material by simply dragging it from the project window and releasing it onto the material you want. If you select a material, in the inspector, you’ll also see “Shader” and the dropdown menu. You can also drop the shader there! 😀
Hi there, pretty great tutorial, as usual! I have two quick questions, though:
1) what exactly is the main input of that shader? I mean, what are the vertices being inputed? I ask that because it wasn’t clear that o.worldPos means, considering that we are passing the position of the points of interest directly via C#;
2) out of curiosity, how many ms does this image effect shader takes to run in your machine (excluding, of course, the Camera.AAResolve command), according to your profile? And in which screen resolution? Thanks!
Thanks for writing this tutorial. I’m using this project as a launching off point for something else, but I’m immediately running into an issue with Unity and Android as the shader from your project fails to compile (pink error) and reports:
Invalid const register num: 201. Max allowed is 31.
I’ve pinned it down to the for loop, most likely, however I’m still pretty novice when it comes to programming shaders. Googling suggests that this error is a response from too many constances being declared, though the code doesn’t outright seem to declare any?
Anyways, do you think, is there possibly a way around this?
Hey Alan,
This version doesn’t work on the 5.4 version, any update?
Hey Alan, thank you very much for this great tutorial!
I was wondering, would it be possible to use lists instead of an array to determine the number of points of the shader.
Thank you!
Hey! Shaders are written in Cg, which unfortunately is not as permissive as C#.
Shaders don’t support List<>, so that is not possible. 🙁
Great tutorial !
It’s possible to draw the points in black ?
Like here : http://static1.squarespace.com/static/56eaffeb22482e96ceb909b8/t/5742565d3c44d80a9c369de4/1463965296661/?format=1000w
Thank you !
Yes, you can either do it via code, or using a different ramp texture.
It’s not working in WebGL : WARNING: Shader Unsupported: ‘Hidden/Heatmap’ – Pass ” has no vertex shader
Do you know why ?
Thnaks !
Hey! This Shader was designed for Unity.
However, Unity 5 has changed the way arrays work in shader.
I will post an update soon. But it still be work on Unity only.
Ok, so this shader version works in Unity Editor but not in Unity WebGL
I have not tried it yet in WebGL.
It might work, as soon as I make the necessary changes for Unity 5.
Found !
Loop only works with harcoded number in WebGL 😉
Thanks for the updated post for 5.4.
I’m missing something regarding the position part of the shader.
In your heatmap example, if I move the quad which has the heatmap, the heatmap seems to be in world space, not staying on top of the quad but stays in same position as I move the quad.
Any help with that would be appreciated
Hey!
Yes, this was the intended behaviour.
I am passing the world position of the points to the shader!
If you want something different, then you’ll have to add (or subtract?!) the position of the quad from the points’ position!
Can you please point me to such subject? I have a 3d object I want to draw a heatmap onto, I have the coordinates of the 3d mesh (in local space and not world space). and I want the material / shader to work wherever I place the 3d object.
Thanks !
You can just pass the position of the quad in world space to the Shader, using material.SetVector4(“_NameOfProperty”, yourQuad.transform.position);
Then, sum (or subtract, depending on the code) this value from the position of the 3D points of the heatmap.
You can also do this directly in the C# code, if you don’t want to pass an extra parameter to the shader.
This is such a great tutorial but we are struggling with the same problem as bergos.. do the modifications have to happen in the vert function? And if so, to o.pos or after it has been converted to worldPos? Any help would be much appreciated!
Figured it out working off of Alan’s recommendation!
–MODS TO SHADER FILE–
1. Add a _QuadTransform Vector Property to the Properties block:
Properties{
_HeatTex(“Texture”, 2D) = “white” {}
_QuadTransform(“Quad Transform Vector”,Vector) = (0,0,0,0)
}
2. Add a _QuadTransform declaration BEFORE you utilize it in the vert function:
#pragma vertex vert
#pragma fragment frag
float4 _QuadTransform; //Added This
3. Modify your vert function to subtract the Quad float3 xyz from o.worldPos.xyz:
vertOutput vert(vertInput input) {
vertOutput o;
o.pos = UnityObjectToClipPos(input.pos);
o.worldPos = mul(unity_ObjectToWorld, input.pos).xyz;
o.worldPos.xyz -= _QuadTransform.xyz; //Added This
return o;
}
–MODS TO HEAT MAP SCRIPT–
4. Add a public quad GameObject Property to script:
public GameObject quad; //Added This
public GameObject parent;
public Vector4[] positions;
public Vector4[] properties;
5. Add setVector call to Start() method
material.SetVector(“_QuadTransform”, quad.transform.position); //This
heatmap.SetInt(“_Points_Length”, count);
heatmap.SetVectorArray(“_Points”, positions);
heatmap.SetVectorArray(“_Properties”, properties);
6. In Update() method call to SetVector to ensure if Quad moves then the shader will be aware and update the heatmap accordingly:
void Update()
{
if (material != null && quad != null)
{
material.SetVector(“_QuadTransform”, quad.transform.position);
}
}
Done!
Awesome! 😀
Now that I have the heatmap moving with the quad.transform.xyz I was curious if you had any thoughts on how to add to the solution to ensure that the heat map follows the quad after a rotation is applied. My use case would be… rotating the Quad about Y as to emulate the Quad spinning like a record player.
I have managed to spin the heatmap but it breaks the logic in the frag() function..
0. Include this:
#include “UnityCG.cginc”
1. Updated Properties, Structs, and variable declarations:
Properties{
_HeatTex(“Texture”, 2D) = “white” {}
_QuadTransform(“Quad Transform Vector”,Vector) = (0,0,0,0)
_RotationDegrees(“Rotation Degrees”, Float) = 0.0
}
float4 _QuadTransform;
float _RotationDegrees;
struct vertInput {
float4 pos : SV_POSITION;
float2 uv : TEXCOORD0;
};
struct vertOutput {
float4 pos : SV_POSITION;
fixed3 worldPos : TEXCOORD1;
float2 uv : TEXCOORD0;
};
2. Added this to the vert() function:
vertOutput o;
o.pos = UnityObjectToClipPos(v.vertex);
o.worldPos = mul(unity_ObjectToWorld, v.vertex);
o.worldPos.xyz -= _QuadTransform.xyz;
// Rotating UV
const float Deg2Rad = (3.14159265359 * 2.0) / 360.0;
// Pivot Pt
float2 pivot = float2(0.5, 0.5);
// Rotation Matrix
float cosAngle = cos(radians(_RotationDegrees));
float sinAngle = sin((_RotationDegrees));
float2x2 rot = float2x2(cosAngle, -sinAngle, sinAngle, cosAngle);
// Rotation with pivot
float2 uv = v.texcoord.xy – pivot;
o.uv = mul(rot, uv);
return o;
3. And return this as a fixed4 from the frag() function instead of the color.
return tex2D(_HeatTex, output.uv);
I can’t figure out how to keep your additional return from the frag() while updating the output.uvs…any thoughts or wisdom for this shader noob would be much appreciated!
Great article! This is the only document i can find about using array in shaders.
I have a question as a beginner: Is “for loop” only supported in vertex shader, not in fragment shader?
I’ve written a fragment shader to show heat map, it works well without loop, but failed with loop.
Hey! I don’t think there’s any issue with for loops in the fragment function!
I have used them for volumetric shaders, if I remember correctly. There are some limitations through. Like texture sampling in for loops.
is this an efficient method? I think looping through an array of 100 elements each foreach pixel is a bit heavy. Am i underestimating the gpu power here? is this also recommended on mobile devices?
Hey!
The problem is not really about efficiency; is about alternatives.
Is there another way to do it that is not as expensive? Sometimes there is, but for certain operations that is unlikely.
To answer your question, this technique is obviously slow because it loops through many points. But the operation done at each step is very simple. I wouldn’t be surprised to see other multi-pass shaders being slower. :p
Hello I am working on Fove (Eye tracking) HMD and I want to generate headmap using your technique. I have passed the rays from an eye to the shader as position but the problem is every time i do it. I dont really get anything. If you could please assist me this. I would really appreciate it.
here is my code.
using System.Collections;
using System.Collections.Generic;
using UnityEngine;
using UnityEngine.UI;
public class EyesTrack : MonoBehaviour {
public FoveInterface fove;
Vector4[] pos;
Vector4[] properties;
public float[] radiuses;
public float[] intensities;
public Material material;
// Use this for initialization
void Start () {
int obj1 = (int) GetComponent ().bounds.size.magnitude;
print (“magniture”+ obj1);
pos = new Vector4[obj1];
radiuses = new float[obj1];
intensities= new float[obj1];
properties = new Vector4[obj1];
}
void Update () {
// position of the object
material.SetInt(“_Points_Length”, pos.Length);
FoveInterfaceBase.EyeRays eyeRay = fove.GetGazeRays ();
Ray rays = new Ray ();
rays = eyeRay.left;
RaycastHit hit;
if (Physics.Raycast (rays, out hit, Mathf.Infinity))
{
for (int i = 0; i < pos.Length; i++)
{
pos [i] = (Vector4)hit.point* Time.deltaTime;
properties [i] = new Vector4 (radiuses [i], intensities [i], 0, 0);
print ("pos at the update " + pos [i]);
}
print ("hit points" + hit.point);
}
material.SetVectorArray("_Points", pos);
material.SetVectorArray("_Properties", properties);
}
}
Dear Abid
Did you solve your problem?
Hello Allan, thanks for the blog. I am grateful for the insightful knowledge you share here. I however have a challenge with 2D or 3D or 4D arrays. Are these possible to be passed to the shaders? I have tried this but I have currently failed to pass multidimensional arrays to the shaders. Please let me know what is possible
Hi! The current API that Unity provides doesn’t allow for multidimensional array.
This is something you might have to write yourself manually I’m afraid!
If the array you want to pass never changes, you could also encode it in a texture (for 2D array) or in a texture3D (for 3D array)!
Hi Alan,
I have created the material and than I associated the shader to the material. What should be the object in the hierarchy should have the material I created ?
Why in the shader Points_Lenght is 0 and _Points and Properties containe 20 elements ? I think they should contain 100 elements like the array in the c# code.
Hi Alan, I downloaded the complete unity package and I tried it with my Unity 2018.2.1f1 but it doesn’t work. Do you have any idea ?
Hi Alan,
How would I go about scaling the size up for this shader? I need it for a map about 15000×15000 in size. When I scale the quad the heatmap.cs is attached to the shader does not scale up. So when looking at my large map you can only see what looks like a pin prick in the center to represent the shader. Can you help?
When tried this shader in android it throws ——– GLSL link error: Error: Uniform _Points cannot find a suitable location/component.
And material appears pink
Could you make another tutorial for 3D heatmap visualization? or any existing 3d heatmap example?
Hi!
Thanks a lot for this work!
Do you know why the shader doesn’t work in the newest unity version but it works with older ones?
Thanks!
https://forum.unity.com/threads/how-to-create-heatmap-in-unity.423163/
Hear is the tip about updated Unity Version.
I have just updated the tutorial, but haven’t updated the ino file yet. So if you’re using the original one, it still miss the new include directive.
Hi Alan,
Tried to make it working on unity 5.4.1f1 but this doesn’t work, no message error appear and texture not draw. How to resolve this ? Thanks a lot
Hey!
It seems that Unity 5.4 added array support for shaders.
This trick apparently doesn’t work anymore! :\
I’ll make a revised tutorial soon-ish! 😀
Thanks Alan !! keep going best Tut
Hello! Tried to make you solution work with Unity 5.4 but failed. Thanks for idea!
Hey! As mentioned in the article, this solution is deprecated in Unity 5.4
This is a link to the new tutorial: http://www.alanzucconi.com/?p=5745
Thanks for respond. Yes, I read new tutorial but still failed. Mind to share you solution updated to 5.4? Thanks.
Hi Alan,
Sorry but after tested on unity 5.4 the new tutorial, nothing appear on map.
Tried:
void Awake ()
{
//Renderer renderer = GetComponent();
//Material material = renderer.sharedMaterial;
//material.SetFloatArray(array);
material.SetInt(“_Points_Length”, 3);
material.SetFloatArray(“_Points”, new float[50]);
material.SetFloatArray(“_Properties”, new float[12]);
}
Any chance to make a working example ? maybe for update unity version too ?
Thanks
Ilan
Hey!
Did you implement the function in Awake to initialise the array to its full size at the start of the scene?