
As promised in my previous development blog about “Still Time”, it’s time to show how levels are processed in order to achieve their polished look.
- [Step 1: tiles map] The level is assembled from a very minimalistic tiles set. The colours used in those tiles are not the ones that will actually appear on the screen. However, they indicates how they will be processed. Blue for unreachable areas, red for room backgrounds and green for lights. There are other colours as well, but they are not shown here in these screenshots.
- [Step 2: background] The background is made using a small image of bricks. Its look, however, is very artificial because they are constantly repeated with no changes.
- [Step 3: background noise] A layer of Perlin noise is added to the background. This will automatically generate the illusion of a variety among bricks.
- [Step 4: darkness] A mask of darkness is superimposed to the level. It will cover the unreachable areas.
- [Step 5: diffusive light] In order to smooth the edges of the mask, light from the red areas is diffused using Gaussian noise. With the same principle, light sources and some other objects are intentionally made brighter.
- [Step 6: dynamic light] In the last step of processing, dynamic lights are added. These Are obtained diffusing a very strong light from the green areas. Objects in front of light sources are subtracted from this mask. Finally, the dynamic light layer is blurred and added. This will produce nice occlusion effects when the character is standing in front of a window.
Step 1: tiles map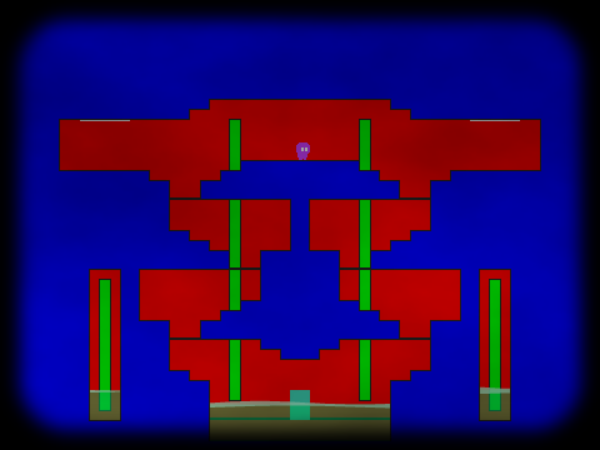 |
Step 2: background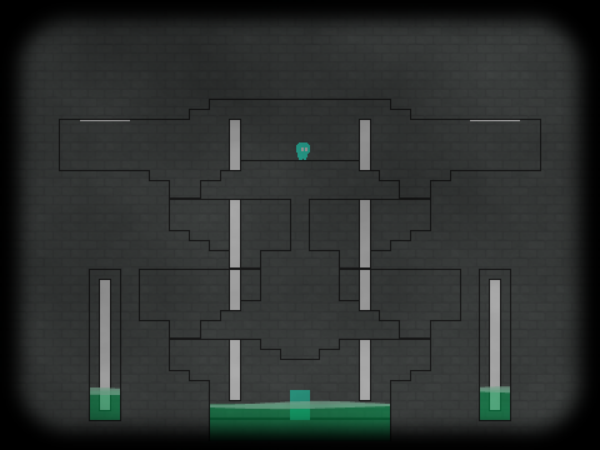 |
Step 3: background noise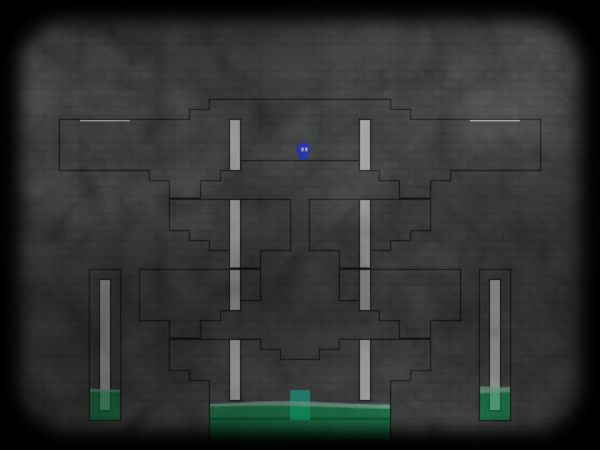 |
Step 4: darkness mask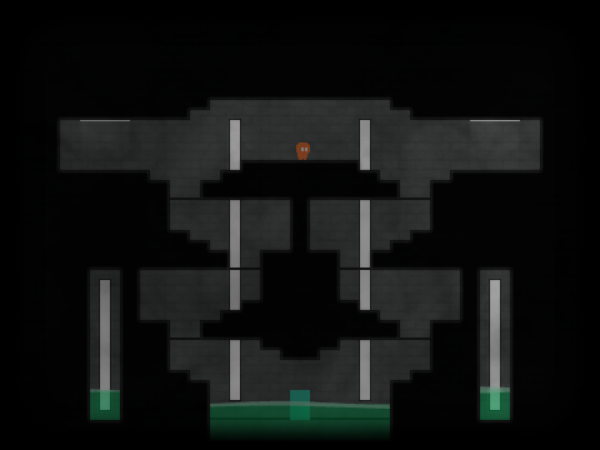 |
Step 5: diffusive light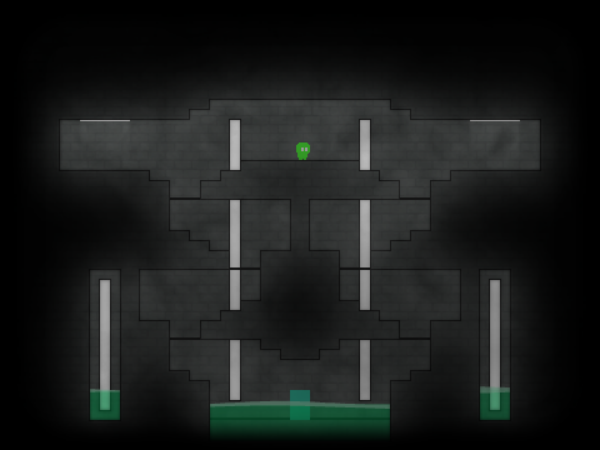 |
Step 6: dynamic light |
Leave a Reply