
This series of articles will offer an overview and a practical tutorial on Minecraft Modding through the creation of data packs and resource packs. If you are interested in extending the game, this is the article for you!
- Part 1: An Introduction to Minecraft Modding
- Part 2: Minecraft Modding: Throwable Fireballs
- Part 3: Minecraft Modding: Laser Gun
At the end of this first article you will also find a link to download a mod that allows to throw fireballs, which is explored in the second article of this series.
Minecraft
Minecraft is a game that needs to introduction. For the ones who are familiar with this blog, writing a tutorial on Minecraft however might seem a bit unusual. While I often write about game development-related subjects, I have never done an entire series about a specific game. But Minecraft is different. It is—on its own—an outlet for endless creativity: not just due to its game mechanics, but to the fact that virtually every aspect of the game is fully customisable.
As of 2021, Minecraft counts 126 million active players. And if even if the tiniest percentage of them would start modding the game, Minecraft could potentially steer millions of young kids towards Science-related fields.
Java vs Bedrock
When we are talking about Minecraft, we are actually referring to an entire ecosystem of different versions. Right now, Minecraft exists in two separate versions: Java Edition and Bedrock Edition. The former was the “original” Minecraft, developed in Java; the latter is a recent C++ port which targets the Microsoft Windows store and it includes microtransactions. These two are separate games, with slight gameplay differences, which one would need to buy separately. For the purpose of this series, we will focus on the Java Edition since that is easier to mod, and is the ones for which more resources are actually available.
Modding
There are many ways in which Minecraft can be modded. Some are easier than others, but they can all be grouped in three major categories:
- Modding: the ability to write custom code to customise virtually every aspect of the game. For the Java Edition, I would strongly recommend The Ultimate Guide to Minecraft Modding with Java in 2021 by David Dodge, which covers this topics in details using Minecraft Forge and Eclipse. How to make a mod for Minecraft, a complete guide is also a beginner friendly read. For the Bedrock Edition, Mojang itself is working on a JavaScript API called the Minecraft Script Language.
- Resource packs and Data packs: the Java Edition supports JSON files a custom scripts to add or replace certain features of the game.
- Command blocks: an in-game feature available in Creative mode, which allows to run simple commands in your worlds.
Modding is definitely the most powerful option. However, it is also the most complex and it requires proper coding skills (either Java or JavaScript). Conversely, resource and data packs are relatively easy and require no additional software to be installed but a simple text editor. They are pretty limited with what they can do, but this is usually enough for most user cases. In this tutorial, we will focus on data packs, as it might be the easiest way for people with no coding background to start customising their worlds.
Blocks, Entities and Items
In Minecraft there are three distinct class of objects you can interact with:
- Blocks: those are the cubes that make up the world. They can be placed on the map to become part of the world, or mined and collected in the inventory.
- Entities: encompasses all of the dynamic objects which are not blocks, such as players, mobs, arrows, boats, minecarts, and so on.
- Items: all of the objects that exists only in the player inventory and hands. When dropped out of the inventory, items becomes an entity with the sprite of the object, waiting to be collected again or disappearing after five minutes.
This distinction is important, because different commands will affect different objects. For instance, you can only summon entities using the /summon command, you can only give items with the /item command, and you can only change world blocks with the /setblock and /fill commands.
Minecraft Commands
Minecraft comes with its own scripting language, which takes the form of a series of simple commands. If you are familiar with coding, using Minecraft commands might be a rather frustrating experience. They are undoubtedly hard to read, as they do not allow for line breaks, and passing data between multiple commands is a pain as they are designed to work independently.
Commands can be run in any world in which Cheats are enabled. All that is needed is to type “/” to open the chat, followed by the command. For instance /tp 0 64 0 will teleport the player to the block which XYZ coordinates are  . A full list of the commands available can be found on the Commands page of the Minecraft Wiki.
Commands can also be executed in-game through a command block, a special item obtainable through the command /give command_block. Command blocks can be used to execute arbitrary commands, and can even chained together to create complex scripts from within the world.

One important aspect to remember is that the parser is very anal, and does not allow for either indentation or spacing of any kind. Even adding two spaces instead of one might result in a syntax error!
Target Selectors
There is one aspect that make Minecraft commands somewhat unique, compared to more traditional coding: target selectors. They allow to specify the target of a command. And, generally speaking, a single command can apply not to one but to several different targets.
For instance: /tp @a 0 64 0 will teleport all players to . This is thanks to the target selector @a, which stands for “all players”.
The other target selectors available in the Java Edition are:
@p: nearest player@r: random player@a: all players@e: all entities@s: entity executing the command (can be changed using the/execute ascommand)
What makes target selector incredibly powerful is the ability to add conditions to restrict the targets which will be subjected to the command. This can be done by using a series of comma-separated arguments in squared brackets. For instance, /tp @e[type=minecraft.cow] 0 64 0 will only teleport cows. Multiple arguments can be used, and Minecraft supports several useful ones to limit the number of elements that will be affected. For instance:
/tp @e[type=minecraft.cow, sort=nearest, limit=1] 0 64 0
wll only teleport the closet cow, since the command is limited to 1. The reference position is the one of the entity who invoked the command; the player, in case you are typing this in the chat.
You can even use target selectors to move to the position of an entity. For instance, the command below will teleport the player to the position of the closest cow.
/tp @p @e[type=minecraft.cow, sort=nearest, limit=1]
Coordinate System
Another relatively unique feature of Minecraft commands is the way in which coordinates can be expressed. Many commands needs a target position. This can be specified implicitly from one entity. In the case command seen above, for instance, using @e[type=minecraft.cow, sort=nearest, limit=1] as the target position teleports the player to the position of the closest cow.

However, coordinates can also be expressed in three alternative ways:
- Absolute (
x y z): the precise x, y and z coordinate of a point; - Relative (
~Δx ~Δy ~Δz): the position of the executor (@s), plus an offset ofΔx,ΔyandΔzblocks on the X, Y and Z axes; - Local (
^Δsway ^Δheave ^Δsurge): the position of the executor (@s), plus an offset ofΔsway,ΔheaveandΔsurgeblocks aligned to their local frame of reference.
For instance, /tp @p ~ ~ ~10 will teleport the player 10 blocks South (the Z axis is aligned towards South), while /tp @p ^ ^ ^10 will teleport the player 10 blocks forward, relative to their facing direction.
If you are familiar with Unity, the difference between relative and local coordinate is a bit the same difference between Vector3.forward (world space) and transform.forward (local space).
Executors
When commands are executed independently, they are fairly easy to use and understand. But when multiple commands are chained, this is where things can get pretty complex.
Generally speaking, there is no easy way to share data between two subsequent commands. However, commands have a sort of “context”, which remembers two things: who is executing the command (as), and where (at). By changing these two, we can also change which entities are going to be affected by the command.
Normally, the target selection @s can be used to refer to the entity that run the command. But with the /execute command, the executor can be changed so that subsequent calls to @s will refer to a different entity.
Let’s imagine that we want to teleport all entities one block in front of the player. This can be done easily as /tp @e ^ ^ ^1. The local coordinate system is referring to the current executor, which in our case would be the player invoking the command.
But what if we want to move all entities one block forward, relative to their current position and rotation? In this case, we need to execute the command assuming that, each time, the entity being moved is considered the executor. This can be done using the execute command:
execute as @e at @s run tp ^ ^ ^1
As before, this new command runs tp ^ ^ ^1 on each entity. But this time, the executor is assumed to be the entity that is targeted. The notation execute as @e at @s means this: execute the following command assuming it is the target entity who run it (as @e) from its current position (at @e). Both as, at and run as sub-commands which can be chained together within execute.
If you are familiar with more traditional imperative languages, this would roughly translate to the following pieces of pseudocode:
// Moves all entity in front of the executor
// tp @e ^ ^ ^1
SetExecutor(player);
SetLocation(player);
foreach (Entity e in EntityList)
{
    Teleport(e, GetLocation().MoveForward(1)); //run tp ^ ^ ^1
}

// Moves all entity one block forward
// execute as @e at @s run tp ^ ^ ^1
SetExecutor(player);
SetLocation(player);
foreach (Entity e in EntityList)
{
    SetExecutor(e); // as @e
    SetLocation(e); // as @s

    Teleport(e, GetCurrentLocation().MoveForward(1)); //run tp ^ ^ ^1
}
The execute command ends with another command, which is invoked using the sub-command run. That can also be a custom-made function.
This is one of the most complex command in Minecraft, counting twelve chainable sub-commands (we have only seen how to chain 3 of them: as, at and run). You can read more about execute on its dedicated page on the Minecraft Wiki.
Minecraft items can store arbitrary data in a custom format known as NBT, Named Binary Tag. Formerly called data tags, NBT tags can be used to associate strings (keys) to certain values. They follow a JSON-like format: {key:value, ...}.
In our case, the 1b notation indicates that the number 1 is stored as a byte. Minecraft supports several different types, such as byte, short, int, long, float, double, string, and even arrays.
You can learn more about the NBT format here.
Functions
Minecraft commands can used in-game in two ways:
- From the chat, with a
/before them; - From a command block, without the
/.
Both of those techniques allow to execute only one command at a time. Command blocks can indeed be chained together to execute complex actions, but this can be quite limiting when what you want to code is complex.
There is a third way to execute Minecraft commands, which is using functions. A function in Minecraft is contained in a file with the .mcfunction extension, which is why the language is sometimes referred to as mcfunction.
The name of a function is fully qualified by the name of the data pack in which it is contained, and the name of its file. Minecraft functions belongs to the namespace/data pack called minecraft.
A function can contain as many commands you want, and they are all executed one after the other in a single game frame/update/tick. Functions can be called using the function command; this works even in in the console and command blocks.
Each function runs in its very own execution context. Calling a function copies the current executor and position; however, any change made by the function is not propagated backwards to the caller.
📚 Debugging ▼Debugging commands in Minecraft is not the easiest thing to do. One reason is that the language is not easily supported by modern programming tools such as Visual Studio. Likewise, it is not easy to find good syntax highlighters which are compatible with all of the mcfunction features.
Below, a few tips on how to code faster:
Reloading
Changes made to your mcfunction files and assets are not reloaded automatically. However, you can reload them manually:
/reloadto reload data packs- F3+T to reload resource packs
Console Log
Minecraft logs are usually not accessible from within the game. You can enable them from the “Settings” panel of the Minecraft Launcher, by checking “Output Log when Minecraft: Java Edition starts“.
Once that is done, starting the game will also launch a handy window which will show all of the debugging information you might need. This is very helpful because it will show any compiler error present in your scripts.

Syntax Highlighting
Understanding Data & Resource Packs
The first step to create a mod for Minecraft, is to understand what we can actually change, and how. Unless you want to write Java code to properly interface with the game, Minecraft allows for a more “lightweight” approach, which relies on two separate things: data packs and resource packs. The former are used to add functionalities, mostly through mcfunctions, which are text files containing a series of commands. Data packs can also be used to add custom recipes, change the loot tables, alter structures and achievements. Resource packs, instead, can be used to customise certain aspects of the graphics, such as adding new textures, models, or even shaders.
Both packs are folders with a specific structure, which needs to be copied inside of you Minecraft folder. The next two sections will briefly explore how to create them. It is also possible to add them as zipped files.
Data Packs Structure
Data packs needs to included inside the “datapacks” folder of your world. If you are on Windows, this usually can be found in the “.minecraft” folder accessible through the “%APPDATA%” folder. The Minecraft Wiki has a very helpful article you can refer to, titled Create a data pack.
A typical data pack will have the following structure:
- 📁 .minecraft
- 📁 saves
- 📁 (WORLD NAME)
- 📁 datapacks
- 📁 name (the name of the mod)
- 📄 pack.mcmeta (contains the name and version of the data pack)
- 📁 data
- 📁 minecraft
- 📁 tags
- 📁 functions
- 📄 load.json (used to tell Minecraft to run a function when the mod is first loaded)
- 📄 tick.json (used to tell Minecraft to run a function every frame)
- 📁 functions
- 📁 tags
- 📁 namespace (the namespace of the mod, which is used in the code)
- 📁 functions
- 💾 *.mcfunction (each file is a function, accessible via code as
namespace:file_name)
- 💾 *.mcfunction (each file is a function, accessible via code as
- 📁 functions
- 📁 minecraft
- 📁 name (the name of the mod)
- 📁 datapacks
- 📁 (WORLD NAME)
- 📁 saves
The names indicated in bolds are the ones that we can actually change. All of the functions containing our commands are stored inside the data/namespace/functions folder. Each file corresponds to a different function, which we can invoke from the console using the /function namespace:function_name command.
“tick” and “loop”
Despite its name, the folder data/minecraft/tags/functions does not contain actual functions, but the file tick.json tells Minecraft that the function called namespace:tick will need to be executed every frame (also known as a tick). This is its actual content:
{
    "values":
    [
        "namespace:tick"
    ]
}
In our case, we will use this trick for all of those commands that needs to run every every.
Minecraft also support a load.json file, which can be used to call a function when the data pack is loaded.
Pack metadata
Lastly, each data pack needs a pack.mcmeta file. This is a JSON file sed to indicate which version the data pack can was designed for, along its description:
{
    "pack":
    {
        "pack_format": 6,
        "description": "My Minecraft mod"
    }
}
The number 6 refers to Minecraft 1.16.
Resource pack
Resource packs work in a similar way, but instead of being stored inside your world, they are stored in the “resourcepacks” folder directly inside “.minecraft”. For more information about how resource packs work, you can have a look at the relative article on the Minecraft Wiki, titled Resource Packs.
While data packs are loaded automatically with the world, resource packs needs to be enabled. You can do so from the Option menu, once the game has loaded (below), or by pressing F3+T in game.
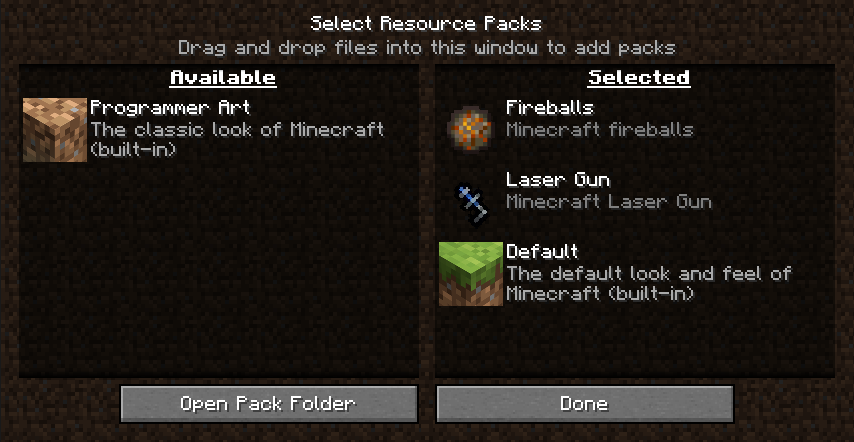
For our specific asset, this is what we will need:
Replacing an item
Resource packs are often used to completely replace the original textures and model in the game. This is why they often contain a “minecraft” folder: they want to replace Minecraft’s original items.
- 📁 .minecraft
- 📁 resourcepacks
- 📁 name (the name of the mod)
- 📄 pack.mcmeta
- 🖼️ pack.png
- 📁 assets
- 📁 minecraft
- 📁 models
- 📁 item
- 📄 item_name.json (this file will change the model of item called
minecraft:item_name)
- 📄 item_name.json (this file will change the model of item called
- 📁 item
- 📁 models
- 📁 namespace (the namespace of the mod)
- 📁 textures
- 📁 item
- 🖼️ image_name.png (this texture can be referred to as
namespace:image_name)
- 🖼️ image_name.png (this texture can be referred to as
- 📁 item
- 📁 textures
- 📁 minecraft
- 📁 name (the name of the mod)
- 📁 resourcepacks
The easiest thing to do is to replace a model with an already existing one. For instance, in the tutorial about throwable fireballs, we will replace render some special snowballs as fire charges. Minecraft supports something called custom model data, which allows affecting only some of the items which have been previously tagged:
{
    "parent": "item/generated",
    "textures":
    {
        "layer0": "item/snowball"
    },

    "overrides":
    [
        {
            "predicate": {"custom_model_data":2538461},
            "model"    : "item/fire_charge"
        }
    ]
}
If you want to replace a texture with a new one, that is also possible. We will see how to do that in the third part of this online series, when we will talk about how to create a Laser gun.
Resource packs can also be used to replace and add sounds. We will explore this in the third part of this course.
The file pack.png can be used to change the icon of the resource pack in the Options menu.
What’s Next…
- Part 1: An Introduction to Minecraft Modding
- Part 2: Minecraft Modding: Throwable Fireballs
- Part 3: Minecraft Modding: Laser Gun
Download Minecraft Mod
Become a Patron!The data packs and resource packs used in this tutorial series to create throwable fireballs and laser guns are available for downloads on Patreon.
💖 Support this blog
This website exists thanks to the contribution of patrons on Patreon. If you think these posts have either helped or inspired you, please consider supporting this blog.
📧 Stay updated
You will be notified when a new tutorial is released!
📝 Licensing
You are free to use, adapt and build upon this tutorial for your own projects (even commercially) as long as you credit me.
You are not allowed to redistribute the content of this tutorial on other platforms, especially the parts that are only available on Patreon.
If the knowledge you have gained had a significant impact on your project, a mention in the credit would be very appreciated. ❤️🧔🏻
Webmentions
[…] as adding new items and recipes. These aspects have been discussed at length in the series titles An Introduction to Minecraft Modding, which covers both data and resource […]
[…] Part 1: An Introduction to Minecraft Modding […]
[…] Part 1: An Introduction to Minecraft Modding […]