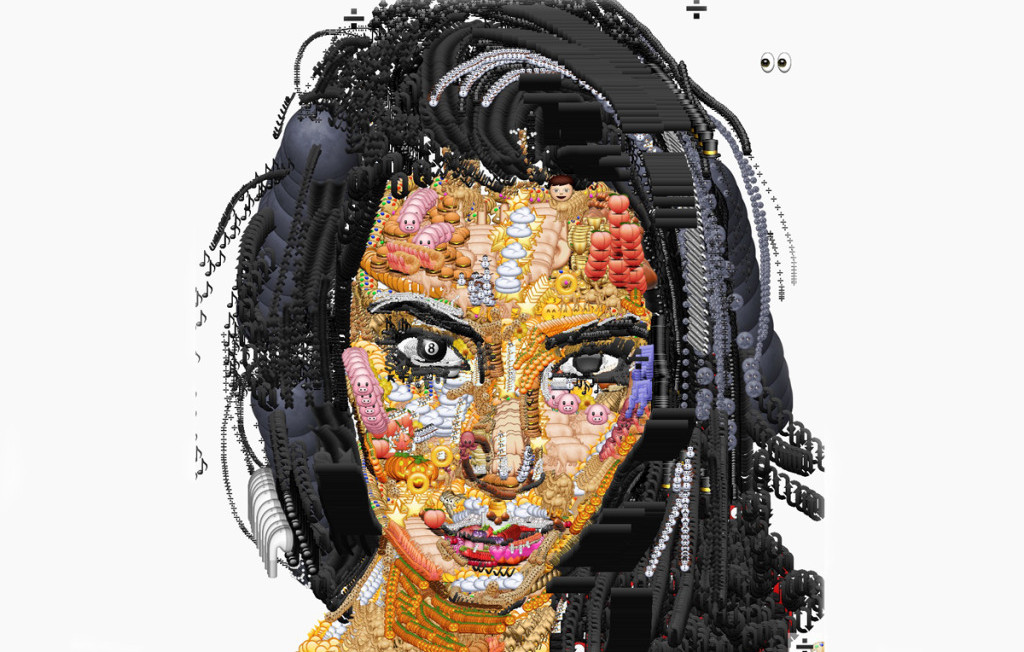
Emoji Portraits
This form allows to create your very own emoji portrait from any picture. Use the sliders to customise the size and angle of the emojis. When you’re happy, right click on the image to save it.
The rest of this article explains how to replicate this effect using JavaScript.
How it’s done…
The inspiration from this tutorial comes from Yung Jake’s emoji portraits, cleverly crafter using a website called Emoji.ink.

The technique used in this tutorial is based on a more automatic approach. Emojifying a picture means replacing some of its pixels with emojis that have a similar colour. The steps requires are:
- Calculating the average colour of a block of pixels,
- Finding the closely matching emoji
- Drawing the selected emoji on top of the block
This is the bare minimum requires to create an emoji mosaic. The first step is achieved by resizing the original image to a smaller size. This scaling operation automatically merges colours together, so that one pixel of the thumbnail will correspond to one emoji. It’s fast and reliable, but creates very regular mosaics. To compensate for this, emojis are slightly rotated and moved around. You can see the difference this makes in the comparison box below.
The most expensive part of this technique is checking each pixels against every emoji. To speed up the emojification process, the average colour of each emoji is calculated and stored into a JSON file for fast retrieving.
The next pages of this tutorial will show how this has been done in JavaScript. This very technique can also be used to create emoji animations.
Extracting emojis
Reading the pixels of an image is possible using getImageData. This method is available only on a canvas, so it is necessary to draw the emoji map onto a canvas. The code below shows how this technique works.
var image = new Image();
image.src = 'emoji.png';
image.addEventListener
(	'load',
	function()
	{
		// Creates a canvas
		var canvas = document.createElement('canvas');
		canvas.width = image.width;
		canvas.height = image.height;

		// Draws the image into the canvas
		var ctx = canvas.getContext('2d');
		ctx.drawImage(image,0,0,canvas.width,canvas.height);

		// Gets the pixels
		var imageData = ctx.getImageData(0,0,canvas.width,canvas.height);
	},
	false
);
An image is loaded asynchronously; its load handler creates a hidden canvas, draws the image onto it and gets its data. The structure returned by getImagedata is an array which contains, for each pixel, its R, G, B and A colour components. Pixels can be retrieved using their position within the image:
function getPixel(imageData, x, y)
{
    var position = ( x + imageData.width * y ) * 4, data = imageData.data;
    return [ data[ position ], data[ position + 1 ], data[ position + 2 ],  data[ position + 3 ]];
}
Extracting emojis
The following code loops over all the emojis within the image file and extract them, one by one. As the name suggests, the function averageColour is used to find the average colour of the current emoji. If null, it means the sampled rectangle was empty and it is not added to the list of emojis.
// Loops over all the emojis
var emojis = [];
for (var x = 0; x < image.width; x += size)
for (var y = 0; y < image.height; y += size)
{
	var emojiData = ctx.getImageData(x,y,size,size);
	var colour = averageColour(emojiData);
	if (colour != null)
		emojis.push(	{'xe':x,'ye':y,'colour':colour}	);
}
Averaging colours
Now that the pixels are available, we need to calculate their average colour. The following code calculates the average colour of an image, by independently averaging the R, G and B components of each pixel. Fully transparent pixels are discarded.
function averageColour (imageData)
{
	// Average colour
	var rgb = [ 0, 0, 0 ];
	var count = 0;
	for (var x = 0; x < image.width; x ++)
	for (var y = 0; y < image.height; y ++)
	{
		var rgba = getPixel(imageData, x, y);
		var alpha = rgba[3] / 255.;
		if (alpha != 1)
			continue;

		rgb[0] += rgba[0] * alpha;
		rgb[1] += rgba[1] * alpha;
		rgb[2] += rgba[2] * alpha;

		count ++;
	}

	// All empty
	if (count == 0)
		return null;

	// Final colour
	rgb[0] = Math.round(rgb[0]/count);
	rgb[1] = Math.round(rgb[1]/count);
	rgb[2] = Math.round(rgb[2]/count);

	return rgbToHsl(rgb[0], rgb[1], rgb[2]);
}
The result of averageColour is represented in the HSL colour space. This function by Garry Tan has been used for the conversion, with some minor changes. Both RGB and HSL components are in the [0-255] range.
function rgbToHsl(r, g, b){
    r /= 255, g /= 255, b /= 255;
    var max = Math.max(r, g, b), min = Math.min(r, g, b);
    var h, s, l = (max + min) / 2;

    if(max == min){
        h = s = 0; // achromatic
    }else{
        var d = max - min;
        s = l > 0.5 ? d / (2 - max - min) : d / (max + min);
        switch(max){
            case r: h = (g - b) / d + (g < b ? 6 : 0); break;
            case g: h = (b - r) / d + 2; break;
            case b: h = (r - g) / d + 4; break;
        }
        h /= 6;
    }

    return [Math.round(h * 255), Math.round(s * 255), Math.round(l * 255)];
}
The distance between two colours is calculated using the euclidean distance between their HSL components.
function distance(a, b)
{
	var xd = a[0] - b[0];
	var yd = a[1] - b[1];
	var zd = a[2] - b[2];
	return Math.sqrt(xd*xd + yd*yd + zd*zd);
}
Comparing colours in the HSL space clusters them in a more natural way, as described in The Incredibly Challenging Task of Sorting Colours.
Image processing
To get better results, the original image is scaled down. This automatically smooths pixels together.
// The thumbnail canvas
var thumbnail = document.createElement('canvas');
thumbnail.width = image.width / emojiSize;
thumbnail.height = image.height / emojiSize;

// Get a scaled down version of the image
var tmb = thumbnail.getContext('2d');
tmb.drawImage(image,0,0,thumbnail.width,thumbnail.height);
var thumbData = tmb.getImageData(0,0,thumbnail.width,thumbnail.height);
Each pixel in the thumbnail version of the original image will be replace with the emoji with the closest colour.
// Loops over all the pixels of the thumbnail
for (var xi = 0; xi < thumbData.width; xi ++)
for (var yi = 0; yi < thumbData.height; yi ++)
{
	var rgb = getPixel(thumbData, xi, yi);
	var emoji = findClosestEmoji(rgb, emojis);

	// Position of the pixel (xi,yi) in the main canvas
	x = xi * emojiSize * offset;
	y = yi * emojiSize * offset;

	// Position of the closest emoji in the emojiMap
	ctx.drawImage
	(	emojiMap, emoji.xe, emoji.ye, emojiSizeMap, emojiSizeMap,
		x, y, emojiSize, emojiSize
	);
}
The closest emoji is found by looping over the previously generated array.
function findClosestEmoji (rgb, emojis)
{
	var min_d = 10000;
	var min_i = 0;

	var hsl = rgbToHsl(rgb[0], rgb[1], rgb[2]);

	// Loops over all the emojis
	for (var i in emojis)
	{
		var d = distance(hsl, emojis[i].colour);
		if (d < min_d)
		{
			min_d = d;
			min_i = i;
		}
	}

	return emojis[min_i];
}
💖 Support this blog
This website exists thanks to the contribution of patrons on Patreon. If you think these posts have either helped or inspired you, please consider supporting this blog.
📧 Stay updated
You will be notified when a new tutorial is released!
📝 Licensing
You are free to use, adapt and build upon this tutorial for your own projects (even commercially) as long as you credit me.
You are not allowed to redistribute the content of this tutorial on other platforms, especially the parts that are only available on Patreon.
If the knowledge you have gained had a significant impact on your project, a mention in the credit would be very appreciated. ❤️🧔🏻


Hi there Alan, I love your artworks. They’re amazing.
I remember a few years ago, watching a documentary or tv show of these guys (could be Americans, I’m not sure), but they were doing the same thing as yourself – making huge portraits of people using emojis or emoticons. So real, so life-like!
I wonder if you’ve seen this movie/documentary yourself? It’s excellent !
I have no idea what the feature was titled or where to find it and I’d absolutely love to watch it again. If you have seen it and/or know what it’s called and where I can watch it, would you be able to share with me please.
I’m hoping I’d see your reply here, on your blog.
Many, many big thanks – and keep up the artworks 🙂
Regards
Cheryl
Hi Cheryl!
Thank you so much for the kind words!
No, I haven’t seen it unfortunately, but now I’m really curious!